
Theater of Mystery Guide
By Zak
This guide is translated based on these guides:
*https://forum.gamer.com.tw/C.php?bsn=12980&snA=74240*
**
Add:
DPS from behind
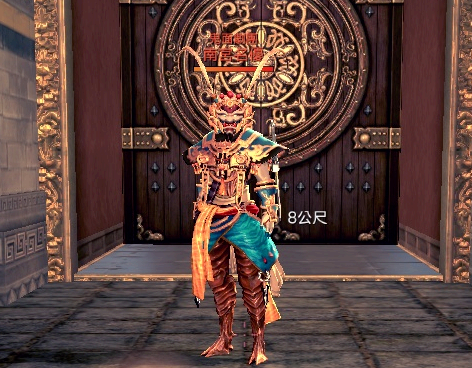
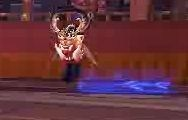
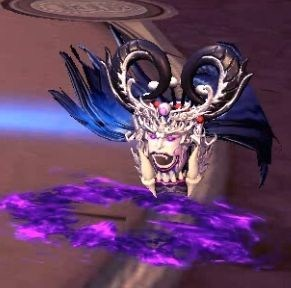
Boss 1
Roles: -Marker (Last one to touch boss)
-1-5 (determines which circle you go into)
Attack Rotation:
Note: Do NOT use tab for normal attacks
Boss DOES NOT reset his rotation after each mech phase,remember where he left off before he phase.
Tanking tips:
Mechanic Phase (90/60/30%):
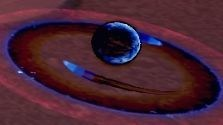
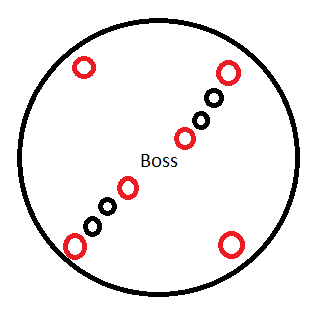
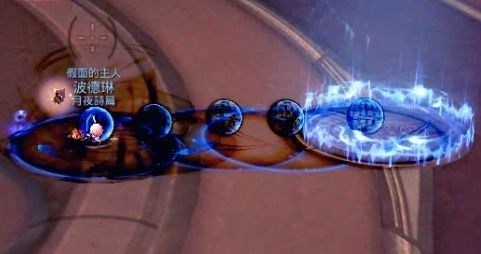
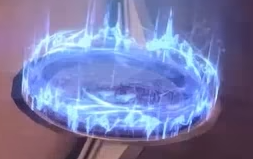
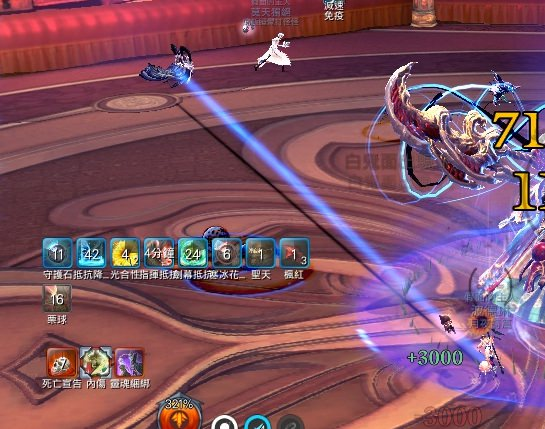
When phase starts, the boss will jump to middle and does an aoe knockup. 5 circles will then spawn clockwise around the room.
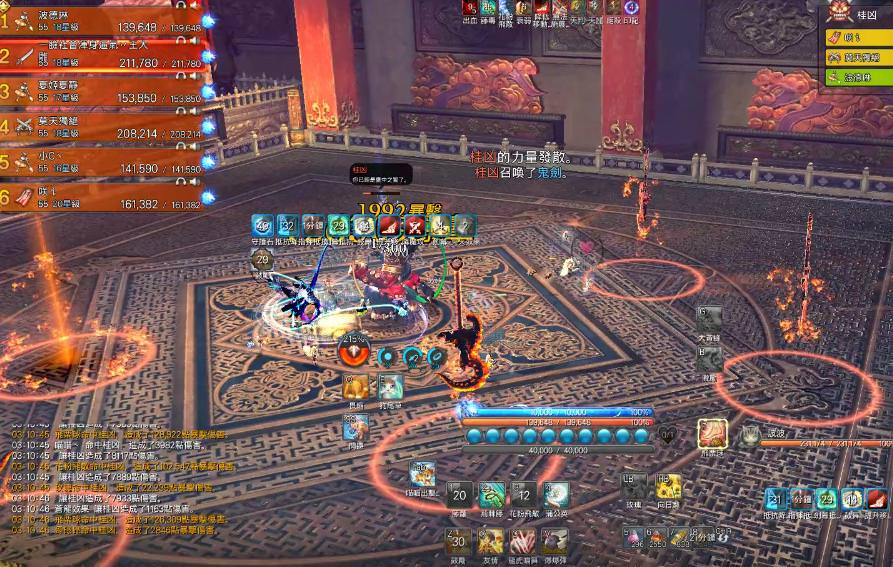
The 5 people that hit the boss first will get a fire buff
 , and should enter their respective circle asap. After entering the circle, the 5 people will be dazed. ONLY TAB after you see the marker enter your circle. Marker will then enter circle 1, which then #1 will tab and activate the circle, giving everyone standing in the circle a stack of flame buff.
When the circle activate, it will send off a white ripple and disappear. After the ripple, everyone in the circle must SS toward the next circle. Then #2 will tab and activate circle, ss to 3rd circle, etc until all the circles are gone.

Note: - If you are a summoner/warlock, put your back towards the next circle so you can dash into the next circle with your tab
- For melees with 8m ss, stand on the edge of the circle then run into the next after you ss.
After all 5 jumps, the marker should have the flame protection buff
 , which gives everyone immunity to the floor after the circle disappear. The boss will then jump toward the group, and open up the cc bar. Stun or kd to finish the phase
Mechanics Phase Flow: Boss jump to mid (aoe) > spawn 5 circles clockwise > people go in circle and get dazed > marker go in 1st circle > #1 tab and activate circle > everyone ss to next > #2 tab and activate circle > everyone ss to next > #3 tab and activate circle > everyone ss to next > #4 tab and activate circle > everyone ss to next > #5 tab and activate circle > boss jump on group > CC
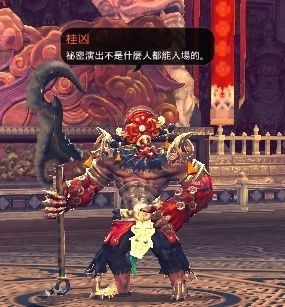
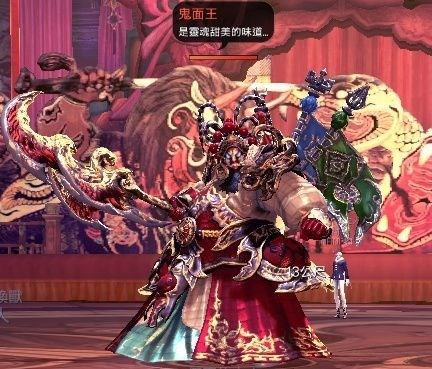
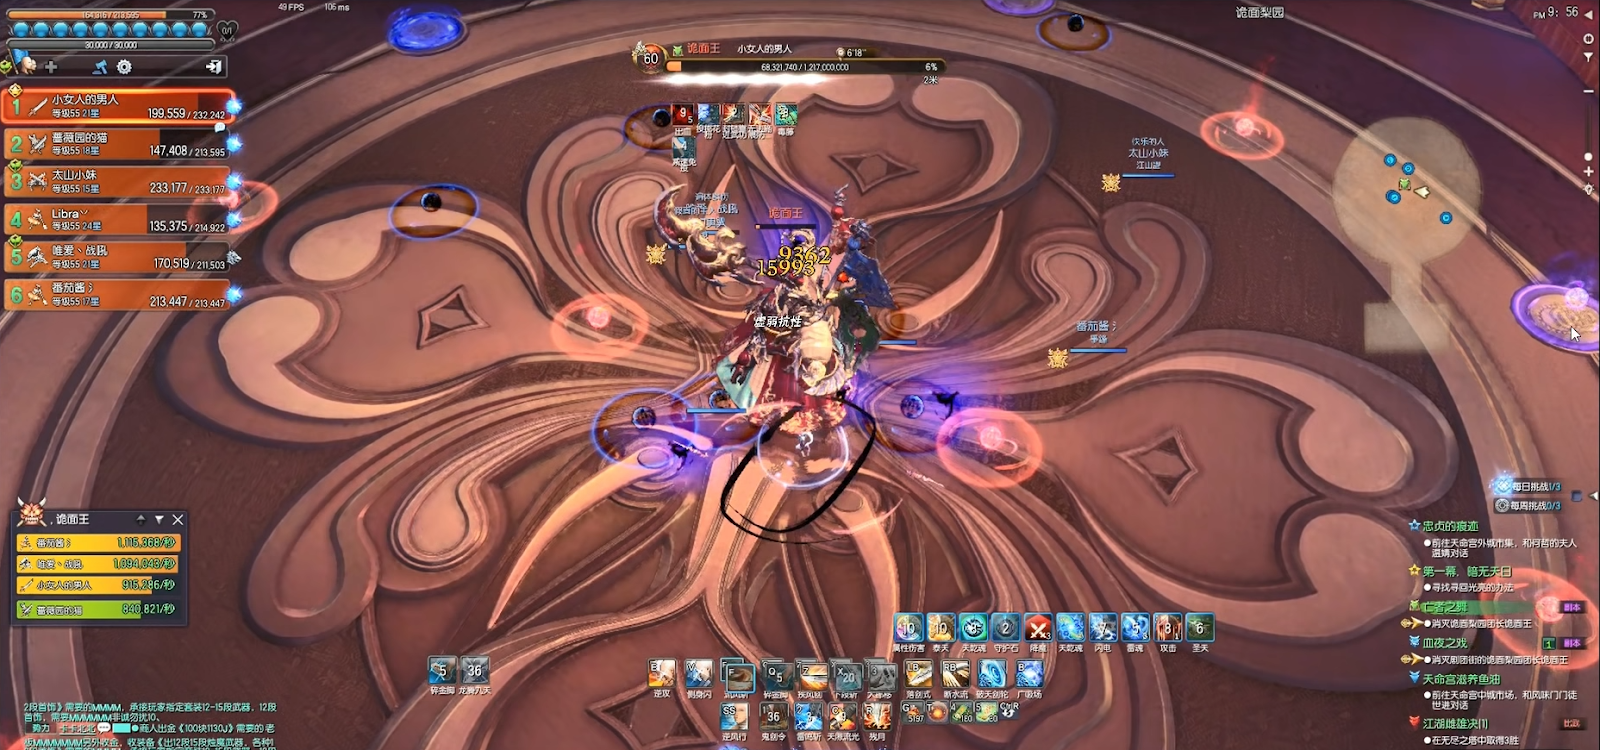
Boss 2
The mechanic of this boss is closely related to the dps of the party. Higher dps groups that can kill with 1 phase will have an easier time. If the boss is under 25% after the 1st phase or if conduction fail on 2nd phase, try to ignore mech and push dps and kill him before the conducting/red mask phase.
Roles:
Red Mask Phase
- Top half conductor
*Red mask and White mask phase roles do not overlap
*Gates can also be conductor if they are a mobile class
Attack Rotation:
- Only cc when boss grip someone or if mech needs it, dont waste cc
- Boss will continue his rotation during mechanics phase
Tanking tips:
Mechanic Phase (1st phase 90%, 2nd phase depends on timer):
*The mechanic phase of this boss starts at 90%, then everything is based on timer, so make sure you are quick on moving around and cc.*
90% > Conduction Phase > Red Mask Phase > White Mask Phase > Conduction Phase > repeat until boss is dead
When the boss hits 90% orbs will spawn on the floor. There are 3 types of orbs: RED orbs, PURPLE orbs, and BLUE orbs. Note that the BLUE orbs will do damage when standing on them.

Conduction Phase (~60 sec):
When boss phase, there will be 4 RED orbs forming a line at either 2/8 o’clock or 4/10 o’clock and 2 RED orbs on the other sides. The side with 4 RED orbs will need to be connected at 9 and 14m for conduction phase. Conductor can be people or orbs. Top/bottom half conductor will then make sure there are orbs/people in the 4 positions for conduction.
To get orb in position, conductors need to go touch a PURPLE orb. After touching PURPLE orb you will get a 3 sec buff
 . At the end of the buff a dark BLUE orbs will spawn. In order to activate these BLUE orbs, you need to stun the boss and the roomwide aoe will turn the orbs into light BLUE orbs. A common way to do the conduction is to have top/bottom conductors to put 2 BLUE orbs at 9/14m and activate them. You can also do 1 orb 1 person to finish conduction. After about 60 sec, conducting will happen and boss will enrage if conduction failed.
Red Mask Phase:
WHILE top/bottom half conductor are setting up conduction, Gate 1 and 2 will need to spawn BLUE orbs by stepping on PURPLE orbs. Gate 1 will need to spawn 5 dark BLUE orbs between the PURPLE orb and the boss, stacking them together. To get the extra 2 orbs, Gate 1 will need to be the farthest person for him to grip and toss the blue orbs to in his rotation. Gate 2 just need to spawn 3 BLUE orbs to activate the transport gate. Note that one PURPLE orb can only spawn 3 BLUE orbs, then it will turn into a gate. Also DO NOT go to the same PURPLE orb as the conductors since one PURPLE orb only spawn 3 BLUE orbs. After both the gates are done spawning orbs and the gates spawn, stun the boss to activate the dark BLUE orbs.
By this time the conduction should be over the Red Mask will spawn at either 2/4/6 o’clock. The Red Mask will go toward the boss and will cause enrage when it gets too close to the boss. At the same time the boss will gain a 5 stack shield
 , reducing most of the incoming damage. To remove the shield, the Gates must create a teleportal in the path of the Red Mask for him to “eat” the 5 BLUE orbs that Gate 1 stacked up.
Right after the Red Mask spawn, both Gates must step on the transport gate created from the PURPLE orbs. If the 2 Gates dont step on the blue gate within 10 sec, both Gates will die and boss will enrage. After stepping on the blue gate, both Gates will be connected with a line.
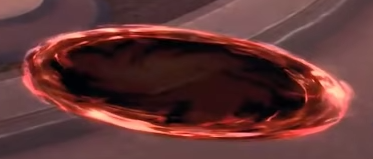
After the 2 Gates connect, Gate 1 will stand where they were while Gate 2 go step on a red circle where the RED orbs were. This will create an EXIT of the teleporter. After the exit is created, Gate 1 will need to quickly move to another red circle while Gate 2 get in position. Gate 2 will need to move between the mask and boss ASAP. Gate 1 will then step on the red circle and create an ENTRANCE for the teleporter. After both are created, move toward the boss.
If the teleporter was set up correctly, the line connecting the two will disappear and the Red Mask should move toward the boss, step on ENTRANCE and comes out on EXIT, continue moving toward the boss and eat the 5 activated BLUE orbs. Removing the stacks on boss and disappearing. The boss will then do a 5 hit aoe which can be sheathed/ignored.
After the 5 hit aoe, the orb transport (or anyone that is free) will need to step on the remaining activated BLUE orbs, which will give a the 3 sec debuff and spawn a dark BLUE orb when it ends. Step on the activated BLUE orb and move it about 3-4m away from boss. Try to space them out and leave safe zones for melee dps.
White Mask Phase (~50 sec):
About 10 sec after the sheath, the boss will spawn 2 White Masks at 12/6 o’clock or 3/9 o’clock connecting and going towards the 2 closest peron. If the line gets too close, the boss will enrage and wipe. The 2 Baits should stand at 2/7 o’clock and go the the White Masks ASAP to take aggro so the start following the Baits. If the White Masks touch anyone, they will enrage. The Baits should then move clockwise (similar to sk) and bait the White Masks until the end of the phase.
As the White Masks follow the Baits they will speed up. To slow them down, KD the boss and the get up attack will stun them and reset their movespeed. Usually the KD in his grip rotation will be enough but you can do extra KD if needed. BD/SF speed boost will also help with the baiting. While the Baits are rotating someone will need to be at the edge of the room to get grip by the normal attacks. If not the Bait will get grip and caught by the White Mask.

As the Baits are rotating, some melees will get a death timer debuff
 that lasts 7 seconds. When the timer reaches 0 you will die. To refresh the debuff, step on one of the dark BLUE orbs that you moved under the boss earlier, or you can step on one of the purple pools he spawn during the phase. Keep refreshing the debuff until the end of the White Mask phase.
*After the White Mask phase, if the boss is ~25% or lower, try to ignore the mech and dps him down since the 2nd phase is significantly harder due to the many extra blue orbs left on the field. If you have high enough DPS, ignore the rest.*
For lower dps groups, you will have to do a 2nd round of mechanic phase. It is highly recommended to use people for the conduction phase rather than orbs since stunning the boss will activate ALL BLUE orbs on the field which messes up the conduction.
After conduction, the two Gates should have their orbs spawned and blue transport gate open. Stun the boss to activate the orbs for the Red Mask to eat the stacked orbs. After the Red Mask disappear, stun again to deactivate all the orbs. After that, make sure to step on all the remaining activated BLUE orbs and continue with the phase.
Note: If there are too many BLUE orbs under the buff, after the 1st stun some people can step on those and move it away. After the 2nd stun, they will be activated. Step on them again and move them away from boss to give melee rooms to dps.
Mechanics Phase Flow: 90% > Conductors move orbs > Gates move orbs > stun > Conductors conduct > Gates step on blue transporter and get connected > Red Mask spawn > Gate 2 step on red transporter > Gate 2 move between Red Mask and boss > Gate 1 step on red transporter > 5 hit aoe > step on remaining light up blue orbs and move it under boss > White Masks spawn > Baits get aggro and rotate clockwise > kd to slow White Masks down > push boss or repeat mechanics phase.
Video:
-Thank You-
By Zak
This guide is translated based on these guides:
*https://forum.gamer.com.tw/C.php?bsn=12980&snA=74240*
**
Add:
DPS from behind
Boss 1
Roles: -Marker (Last one to touch boss)
-1-5 (determines which circle you go into)
Attack Rotation:
- Frontal 2 swipe (2nd hit knock up)
- Frontal slam
- Backward slam x2 (knock up)
- 360 Spin (stun/kd)
- Stomp (knockup)
- Front charge (ss)
- Triple slam (stun/kd)
Note: Do NOT use tab for normal attacks
Boss DOES NOT reset his rotation after each mech phase,remember where he left off before he phase.
Tanking tips:
- Start the boss then walk behind him to dodge the front swipes
- q/e the front slam so the backslam is pointed at same direction as front slam
- Try to cc the 360 spin so no one gets knockback and tab
- Ss + approach the front charge then q/e the triple slam to point it away from the group
Mechanic Phase (90/60/30%):
When phase starts, the boss will jump to middle and does an aoe knockup. 5 circles will then spawn clockwise around the room.
The 5 people that hit the boss first will get a fire buff
When the circle activate, it will send off a white ripple and disappear. After the ripple, everyone in the circle must SS toward the next circle. Then #2 will tab and activate circle, ss to 3rd circle, etc until all the circles are gone.
Note: - If you are a summoner/warlock, put your back towards the next circle so you can dash into the next circle with your tab
- For melees with 8m ss, stand on the edge of the circle then run into the next after you ss.
After all 5 jumps, the marker should have the flame protection buff
Mechanics Phase Flow: Boss jump to mid (aoe) > spawn 5 circles clockwise > people go in circle and get dazed > marker go in 1st circle > #1 tab and activate circle > everyone ss to next > #2 tab and activate circle > everyone ss to next > #3 tab and activate circle > everyone ss to next > #4 tab and activate circle > everyone ss to next > #5 tab and activate circle > boss jump on group > CC
Boss 2
The mechanic of this boss is closely related to the dps of the party. Higher dps groups that can kill with 1 phase will have an easier time. If the boss is under 25% after the 1st phase or if conduction fail on 2nd phase, try to ignore mech and push dps and kill him before the conducting/red mask phase.
Roles:
Red Mask Phase
- Top half conductor
- Bottom half conductor
- Gate 1
- Gate 2
- Orb transport (optional)
- Bait x2
- Marker x2
*Red mask and White mask phase roles do not overlap
*Gates can also be conductor if they are a mobile class
Attack Rotation:
- Frontal Swipes
- Frontal slam then backward slam (knock up/cc-able)
- Frontal Swipes
- 360 Spin (knock back)
- Grip farthest person (usually KD, stun only if mechs needs it)
- Throw 2 BLUE orbs at the farthest person
- Roomwide aoe (can ignore, iframe if debuff stack is too high iframe)
- Only cc when boss grip someone or if mech needs it, dont waste cc
- Boss will continue his rotation during mechanics phase
Tanking tips:
- It is recommended for tank to call out cc for grip since everyone will be moving around the map
- Try not to point his attacks toward the Red/Purple orbs so transporters wont get interrupted
- If tank gets knockback, he will one-shot the tank
Mechanic Phase (1st phase 90%, 2nd phase depends on timer):
*The mechanic phase of this boss starts at 90%, then everything is based on timer, so make sure you are quick on moving around and cc.*
90% > Conduction Phase > Red Mask Phase > White Mask Phase > Conduction Phase > repeat until boss is dead
When the boss hits 90% orbs will spawn on the floor. There are 3 types of orbs: RED orbs, PURPLE orbs, and BLUE orbs. Note that the BLUE orbs will do damage when standing on them.
Conduction Phase (~60 sec):
When boss phase, there will be 4 RED orbs forming a line at either 2/8 o’clock or 4/10 o’clock and 2 RED orbs on the other sides. The side with 4 RED orbs will need to be connected at 9 and 14m for conduction phase. Conductor can be people or orbs. Top/bottom half conductor will then make sure there are orbs/people in the 4 positions for conduction.
To get orb in position, conductors need to go touch a PURPLE orb. After touching PURPLE orb you will get a 3 sec buff
Red Mask Phase:
WHILE top/bottom half conductor are setting up conduction, Gate 1 and 2 will need to spawn BLUE orbs by stepping on PURPLE orbs. Gate 1 will need to spawn 5 dark BLUE orbs between the PURPLE orb and the boss, stacking them together. To get the extra 2 orbs, Gate 1 will need to be the farthest person for him to grip and toss the blue orbs to in his rotation. Gate 2 just need to spawn 3 BLUE orbs to activate the transport gate. Note that one PURPLE orb can only spawn 3 BLUE orbs, then it will turn into a gate. Also DO NOT go to the same PURPLE orb as the conductors since one PURPLE orb only spawn 3 BLUE orbs. After both the gates are done spawning orbs and the gates spawn, stun the boss to activate the dark BLUE orbs.
By this time the conduction should be over the Red Mask will spawn at either 2/4/6 o’clock. The Red Mask will go toward the boss and will cause enrage when it gets too close to the boss. At the same time the boss will gain a 5 stack shield
Right after the Red Mask spawn, both Gates must step on the transport gate created from the PURPLE orbs. If the 2 Gates dont step on the blue gate within 10 sec, both Gates will die and boss will enrage. After stepping on the blue gate, both Gates will be connected with a line.
After the 2 Gates connect, Gate 1 will stand where they were while Gate 2 go step on a red circle where the RED orbs were. This will create an EXIT of the teleporter. After the exit is created, Gate 1 will need to quickly move to another red circle while Gate 2 get in position. Gate 2 will need to move between the mask and boss ASAP. Gate 1 will then step on the red circle and create an ENTRANCE for the teleporter. After both are created, move toward the boss.
If the teleporter was set up correctly, the line connecting the two will disappear and the Red Mask should move toward the boss, step on ENTRANCE and comes out on EXIT, continue moving toward the boss and eat the 5 activated BLUE orbs. Removing the stacks on boss and disappearing. The boss will then do a 5 hit aoe which can be sheathed/ignored.
After the 5 hit aoe, the orb transport (or anyone that is free) will need to step on the remaining activated BLUE orbs, which will give a the 3 sec debuff and spawn a dark BLUE orb when it ends. Step on the activated BLUE orb and move it about 3-4m away from boss. Try to space them out and leave safe zones for melee dps.
White Mask Phase (~50 sec):
About 10 sec after the sheath, the boss will spawn 2 White Masks at 12/6 o’clock or 3/9 o’clock connecting and going towards the 2 closest peron. If the line gets too close, the boss will enrage and wipe. The 2 Baits should stand at 2/7 o’clock and go the the White Masks ASAP to take aggro so the start following the Baits. If the White Masks touch anyone, they will enrage. The Baits should then move clockwise (similar to sk) and bait the White Masks until the end of the phase.
As the White Masks follow the Baits they will speed up. To slow them down, KD the boss and the get up attack will stun them and reset their movespeed. Usually the KD in his grip rotation will be enough but you can do extra KD if needed. BD/SF speed boost will also help with the baiting. While the Baits are rotating someone will need to be at the edge of the room to get grip by the normal attacks. If not the Bait will get grip and caught by the White Mask.
As the Baits are rotating, some melees will get a death timer debuff
*After the White Mask phase, if the boss is ~25% or lower, try to ignore the mech and dps him down since the 2nd phase is significantly harder due to the many extra blue orbs left on the field. If you have high enough DPS, ignore the rest.*
For lower dps groups, you will have to do a 2nd round of mechanic phase. It is highly recommended to use people for the conduction phase rather than orbs since stunning the boss will activate ALL BLUE orbs on the field which messes up the conduction.
After conduction, the two Gates should have their orbs spawned and blue transport gate open. Stun the boss to activate the orbs for the Red Mask to eat the stacked orbs. After the Red Mask disappear, stun again to deactivate all the orbs. After that, make sure to step on all the remaining activated BLUE orbs and continue with the phase.
Note: If there are too many BLUE orbs under the buff, after the 1st stun some people can step on those and move it away. After the 2nd stun, they will be activated. Step on them again and move them away from boss to give melee rooms to dps.
Mechanics Phase Flow: 90% > Conductors move orbs > Gates move orbs > stun > Conductors conduct > Gates step on blue transporter and get connected > Red Mask spawn > Gate 2 step on red transporter > Gate 2 move between Red Mask and boss > Gate 1 step on red transporter > 5 hit aoe > step on remaining light up blue orbs and move it under boss > White Masks spawn > Baits get aggro and rotate clockwise > kd to slow White Masks down > push boss or repeat mechanics phase.
Video:
- Boss 1 SUM Marker POV:
- Boss 2 SUM Gate 1/Bait POV:
- Boss 1 BM Tank POV:
- Boss 2 BM Tank POV:
- Boss 2 WL Conduct POV: https://www.youtube.com/watch?v=zr_IF3wpViA
-Thank You-