
The Red Automaton Unit, a mysterious group of automaton meddlers, have overtaken the Tomb of the Exiled. They have captured several Talus Engineers and forced them to use their expertise of the Naryu to revive the Infernal Lord.
Requirements/Recommendations:
Corridor:
At the bottom of the pit is a miniboss, 1,260,000 Normal HP / 1,980,000 Hard HP Destroyer Lo Dan, surrounded by numerous Gunner, Force Master, Shieldbearer, and Automaton adds that are attracted once he is attacked. After tagging him, run behind the statue on the right to hide and draw all the adds in the corner to burst them down. If there is an Assassin, they can damage him in stealth for about half a minute until all the adds lose interest, after which they can safely pull only Lo Dan himself to the rest of the party.
Once Lo Dan is dead, a Dragon Pulse will spawn. Take it and kill the two Blade Master Workhouse Sentries guarding the boss chamber.
Jang Ghibu:
Normal HP: 5,227,200
Hard HP: 7,920,000
Enrage: 5:00
CC: 2x
Mengwol/Muwol:
Normal HP: 1,735,800
Hard HP: 2,630,000
This Force Master boss is accompanied by his two Destroyer wives, Mengwol and Muwol, from the second boss of Tomb of the Exiles; if one of them dies, Jang Ghibu enrages and wipes the party.
Mengwol Rotation:
If her aggro holder stands too far 9 meters or further away, she will throw her axe to pull you back. If the axe throw fails, she will jump on you for an area of effect Knockdown.
Any of her knockdowns may cause her to launch you and hit you with an aerial Piledriver, which does sizable damage.
As majority of Mengwol's attacks are unblockable, it is advised to have a ranged class to kite her around.
Muwol Rotation:
If her aggro holder stands 9 meters or further away, she will perform a shoulder charge inflicting Daze.
Jang Ghibu Rotation:
100%-71%:
If the tank stands 9 meters or further away, Jang Ghibu uses Flame Fury to throw a volley of fire projectiles, then slides behind his aggro holder.
Periodically, Jang Ghibu casts Heatwave in between rotations, dropping a fire flower, then shortly detonate it for a unblockable area of effect Knockdown.
70%-41%:
If the tank stands 9 meters or further away, Jang Ghibu uses Frost Fury to throw a volley of frost projectiles, then slides behind his aggro holder.
Periodically, Jang Ghibu says "You will be mesmerized..." or "You cannot resist me!", puts the furthest person from him in Frost Prison, slides behind them, and slowly casts Ice Coil for massive damage on the person in Frost Prison. Frost Prison can be escaped from Second Wind, and the Ice Coil casting can be CC'd.
40%-0%:
If the tank stands 9 meters or further away, Jang Ghibu uses Flame/Forst Fury to throw a volley of flame/frost projectiles, then slides behind his aggro holder
Periodically, Jang Ghibu casts Frost Prison at the furthest person, slides behind them, and casts a linear rectangular Dual Dragons for massive damage on the person in Frost Prison. Dual Dragons comes out much faster than Ice Coil in the previous phase.
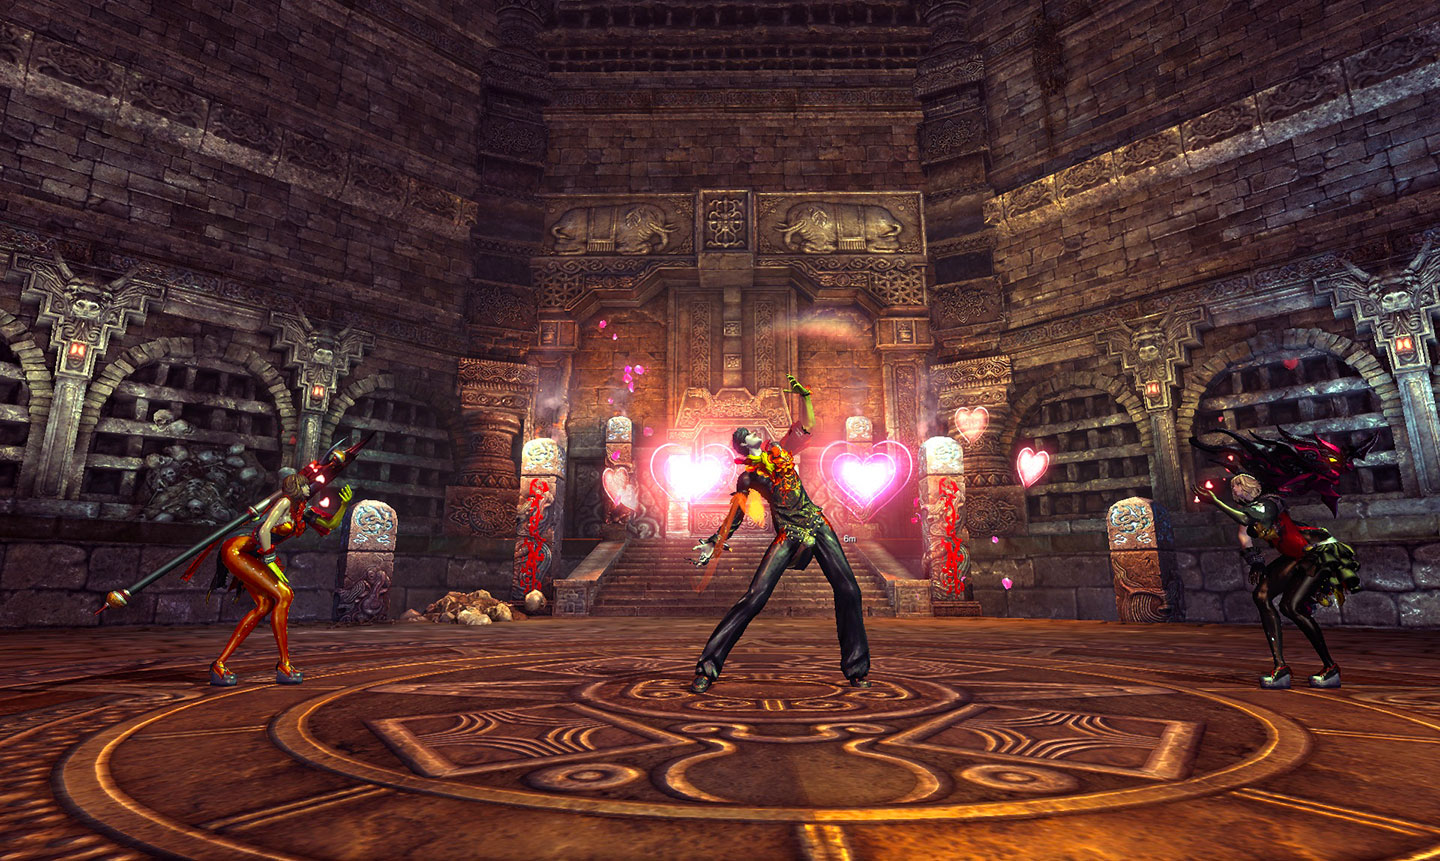
Love Barrier:
At the start of the fight, a message warns “Mengwol and Muwol send their love to Jang Ghibu” and Jang Ghibu’s wives will give him two buffs: "Mengwol's Romance" and "Muwol's Passion", a love barrier giving him 45% damage reduction times two, for 90% reduction. When either of his wives reach 70% health, Jang Ghibu will transfer his shield to them allowing him to be properly damaged; when transferring the second shield all his debuffs are cleansed. An unblockable small area of effect five-second Time Bomb is generated on the wives once the shield is successfully transferred.
Special Phase 70%/40%:
Following this, Jang Ghibu switches rotation and the wives continue their own rotation. The wives must then be re-damaged back to 70% to transfer the shield from the boss to them.
Coordinate with the party on which of the Blade Master/Blade Dancer, Force Master/Destroyer, and Assassin/Summoner should use their party iframe on what segment of the attack.
Special Phase 20%:
After 20%, every 30 seconds Jang Ghibu only casts 3-hit area of effect once, while the wives spin around bouncing around inflicting Aerial and heal completely, but don't transfer back the shield.
Defeating Mengwol and Muwol:
Once Jang Ghibu is defeated, both wives will lose their shield and become Dazed for a while. The two can safely be defeated afterwards in order to progress.
Normal Mode Differences:
Corridor:
Lots of Gunner, Spearman, and Shieldbearer mobs in the way. If there is an Assassin, let them use Lotus of Rescue to teleport the party past the trash; wait for them to respec to Fighting Spirit before moving on.
Ahead is a miniboss, 1,118,000 Normal HP / 1,800,000 Hard HP Force Master Detector, and behind him is a fire wall. He spawns numerous automatons that pinball around the room, so lure him to one of the gaps on the walls which they can't reach. In addition to frost attacks, at 70% and 30% health, Detector casts Frost Prison when announcing "We are invincible!" then summon four self-destructing automatons.
After the Detector is down, all the automatons will self-destruct.
Ahead there are numerous steps that are scaled with windwalking. At the top is a lever that spawns a Dragon Pulse for the rest of the party to skip the steps.
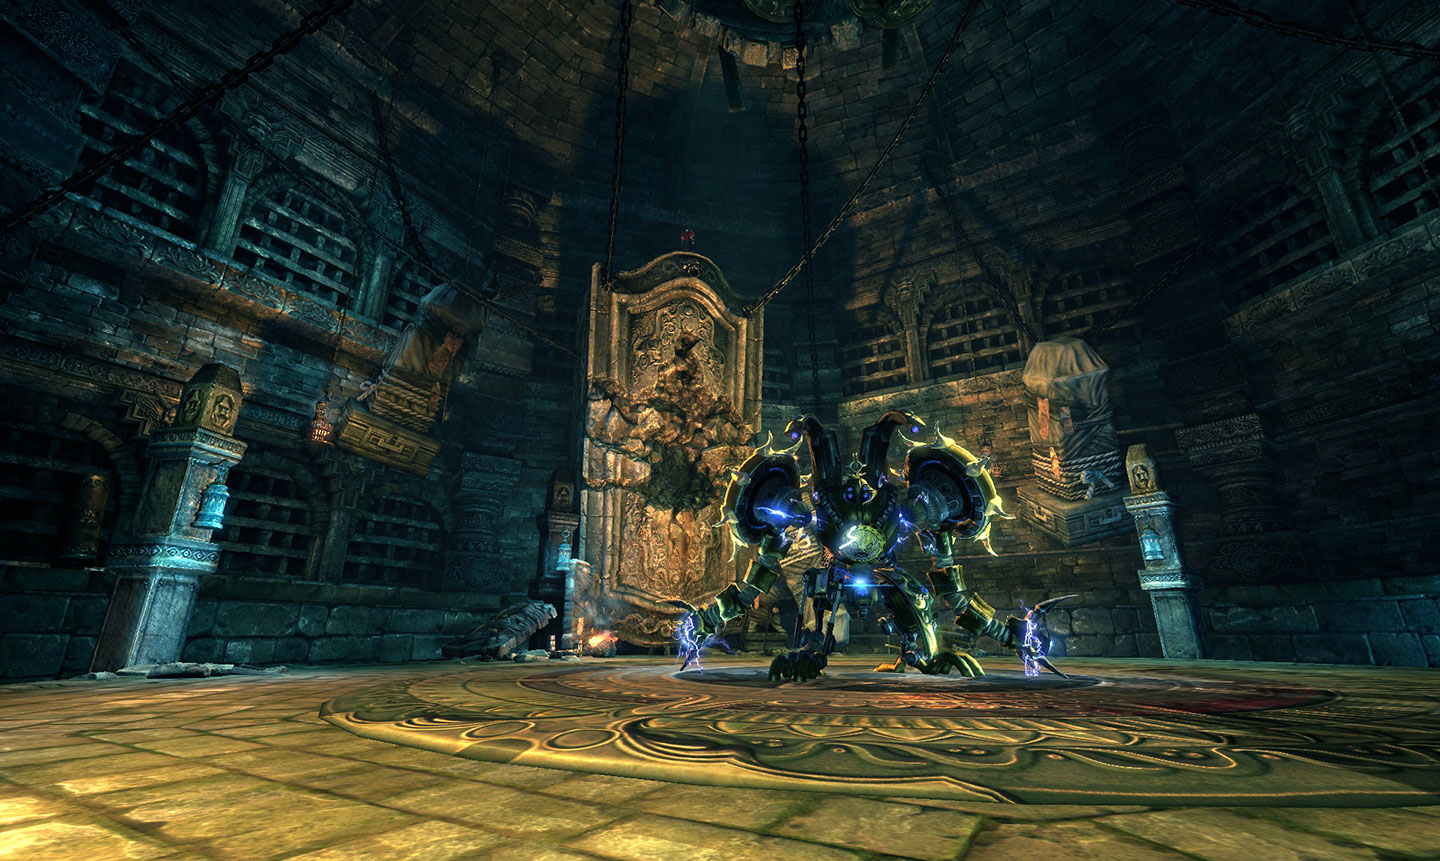
Iron Juggernaut:
Normal HP: 11,946,000
Hard HP: 18,100,000
Enrage: 6:00
CC: 2x
Rotation:
Many of this boss’s attacks closely resemble Ironsides’ from Talus Dungeon and Ironheart from Mushin’s Tower Floor 14.
If Iron Juggernaut is Knocked Down, it will fire a unblockable area of effect electric pulse and get back up, inducing Knockdown.
If the tank 5 meters or further away, Iron Juggernaut performs an electric projectile pull. If this succeeds, Iron Juggernaut curls up and slams the ground, producing a field-wide unblockable shockwave.
Special Phase:
After 15 seconds since the start of his rotation, Iron Juggernaut enters a mechanic:
Normal Mode Differences:
Corridor:
Lots of Combat Automatons in the way; watch out for the Guard Automaton siren patrols, who use an electric pull and activates the nearby automaton turrets. Let the Assassin use Lotus of Rescue, however the last two of three siren patrols have True Sight so be careful.
Take the Dragon Pulse to the final segment. Here are more siren patrols and automaton turrets, along with blue stun lasers and red instant death lasers. Pulling the lever at the end of this segment despawns the lasers and automatons.
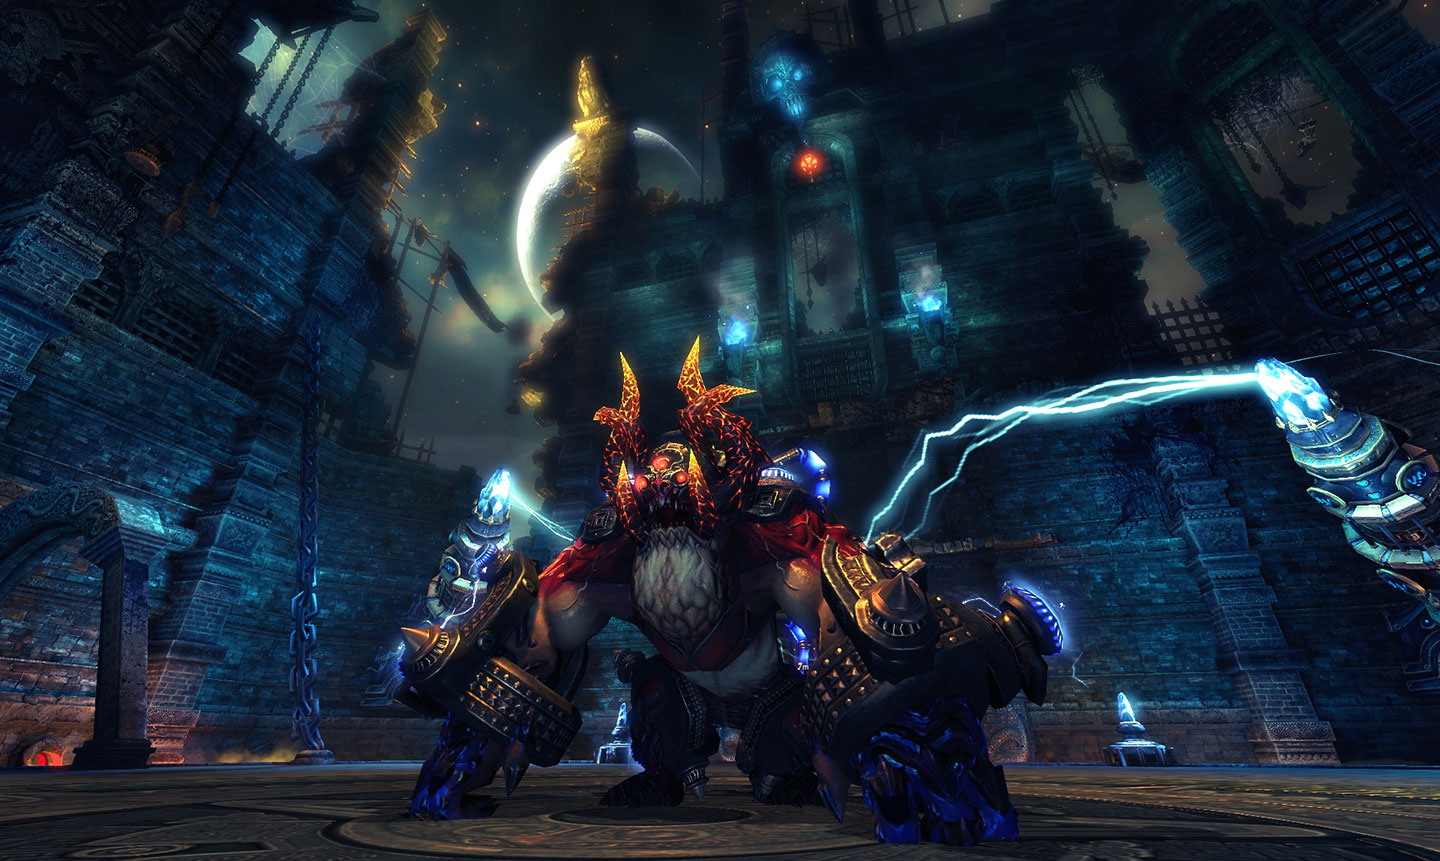
Lord of the Flame:
Normal HP: 43,956,000
Hard HP: 66,600,000
Enrage: 8:20
CC: 2x
The Infernal Lord revived with its flame power intact and refitted with a new lightning power; it is much more stronger and faster thanks to its newfound strength. It proves as the first true challenge for endgame, with a complex mechanic that easily spells doom if failed; coordination is key to surviving and winning this fight.
Despite it’s dauntingly high health, the Lord of the Flame is heavily damaged through player buffs and mechanics.
Rotation:
If Knocked Down, Lord of the Flame does a quick get-up unblockable area of effect ground pound.
If the tank stands 9 meters or further away:
Special Rotation:
Periodically, Lord of the Flame will enter a new rotation in the middle of his standard one, and won't stop to do anything else until after this rotation is completed:
Special Phase 90%/60%/30%:
On 90%, 60%, and 30%, Lord of the Flame initiates his mechanics:
In the event people die, and there is no Summoner/Soul Fighter to cast Farewell/Slipping Lotus to revive them or they cannot use revival charms, the tank can stand 8 meters from Lord of the Flame and kite him around while the others revive the fallen. Lord of the Flame runs very slowly to catch-up but enough for the tank to stay under the "too far" range. This can only be done in his normal rotation.
Normal Mode Differences:
Requirements/Recommendations:
- Act IV, Chapter 10: The Gates Open
- Oath Necklace – Stage 1
- Stone of Wisdom
- Awakened Black Ice Ring
- Oblivion Soul Shield
- Shadovv: Writer
- Hikkidol Jang Ghibu Rotation
- Praetor19 Forgotten Tomb Showcase/Guide
- AeonWcs Desolate Tomb Guide Part 1
- AeonWcs Desolate Tomb Guide Part 2
Corridor:
At the bottom of the pit is a miniboss, 1,260,000 Normal HP / 1,980,000 Hard HP Destroyer Lo Dan, surrounded by numerous Gunner, Force Master, Shieldbearer, and Automaton adds that are attracted once he is attacked. After tagging him, run behind the statue on the right to hide and draw all the adds in the corner to burst them down. If there is an Assassin, they can damage him in stealth for about half a minute until all the adds lose interest, after which they can safely pull only Lo Dan himself to the rest of the party.
Once Lo Dan is dead, a Dragon Pulse will spawn. Take it and kill the two Blade Master Workhouse Sentries guarding the boss chamber.
Jang Ghibu:
Normal HP: 5,227,200
Hard HP: 7,920,000
Enrage: 5:00
CC: 2x
Mengwol/Muwol:
Normal HP: 1,735,800
Hard HP: 2,630,000
This Force Master boss is accompanied by his two Destroyer wives, Mengwol and Muwol, from the second boss of Tomb of the Exiles; if one of them dies, Jang Ghibu enrages and wipes the party.
Mengwol Rotation:
- Targeted axe thrust.
- Unblockable rectangle kick inducing Knockdown. Not CC'able.
- Targeted axe swing.
- Unblockable arc axe swing with a bit of windup, inducing Knockdown. Not CC'able.
- Flaming 5-hit spins, this is actually a blockable attack despite having no indicator.
If her aggro holder stands too far 9 meters or further away, she will throw her axe to pull you back. If the axe throw fails, she will jump on you for an area of effect Knockdown.
Any of her knockdowns may cause her to launch you and hit you with an aerial Piledriver, which does sizable damage.
As majority of Mengwol's attacks are unblockable, it is advised to have a ranged class to kite her around.
Muwol Rotation:
- A linear rectangular axe chop that draw flame a distance in front of her.
- Another linear rectangular axe chop.
- Yet another linear rectangular axe chop.
- 5-hit spins. The first 0.5 sec of this spin has a deflect effect, and if hit into she'll do a yellow axe sweep for Knockdown into a launch for an aerial Piledriver. Not CC'able.
If her aggro holder stands 9 meters or further away, she will perform a shoulder charge inflicting Daze.
Jang Ghibu Rotation:
100%-71%:
- Fast cast fire projectile, inflicts Ember
- Slow cast fire projectile, inflicts Ember
- Instant linear rectangular fire Dragonblaze, inflicts Daze and Ember
- Fast casting unblockable area of effect Fire Storm, inflicts Aerial if Dazed, inflicts Ember. Can be CC'd.
- Instant bouncing fire projectile, deals no damage but stacks 2 Embers
- Instant rectangle Impact, detonates Embers for very high damage
If the tank stands 9 meters or further away, Jang Ghibu uses Flame Fury to throw a volley of fire projectiles, then slides behind his aggro holder.
Periodically, Jang Ghibu casts Heatwave in between rotations, dropping a fire flower, then shortly detonate it for a unblockable area of effect Knockdown.
70%-41%:
- Instant frost projectile, inflicts Chill for movement speed reduction and approach skill disables, transitions into Freeze on 3 stacks of chill inflicting root and Ice Coil explosion if the root is not escaped from
- Slow cast frost projectile, inflicts Chill
- Instant linear rectangle frost beam, inflicts Freeze, can be CC'd.
- Instant frost projectile, inflicts Stun and Freeze, can be CC'd.
If the tank stands 9 meters or further away, Jang Ghibu uses Frost Fury to throw a volley of frost projectiles, then slides behind his aggro holder.
Periodically, Jang Ghibu says "You will be mesmerized..." or "You cannot resist me!", puts the furthest person from him in Frost Prison, slides behind them, and slowly casts Ice Coil for massive damage on the person in Frost Prison. Frost Prison can be escaped from Second Wind, and the Ice Coil casting can be CC'd.
40%-0%:
- Slow cast fire projectile, inflicts Ember
- Instant bouncing fire projectile, deals no damage but stacks 2 Embers
- Sets a ring of fire, an unblockable targeted aoe with a wide area that will detonate the next attack
- Slow cast wide linear unblockable rectangular flame Dragonchar, can be CC'd.
- Instant Impact, detonates Embers
- Slow cast frost projectile
- Slow cast wide linear rectangular frost, inflicts Freeze, can be CC'd.
- Ice Coil, regardless of Freeze status
If the tank stands 9 meters or further away, Jang Ghibu uses Flame/Forst Fury to throw a volley of flame/frost projectiles, then slides behind his aggro holder
Periodically, Jang Ghibu casts Frost Prison at the furthest person, slides behind them, and casts a linear rectangular Dual Dragons for massive damage on the person in Frost Prison. Dual Dragons comes out much faster than Ice Coil in the previous phase.
Love Barrier:
At the start of the fight, a message warns “Mengwol and Muwol send their love to Jang Ghibu” and Jang Ghibu’s wives will give him two buffs: "Mengwol's Romance" and "Muwol's Passion", a love barrier giving him 45% damage reduction times two, for 90% reduction. When either of his wives reach 70% health, Jang Ghibu will transfer his shield to them allowing him to be properly damaged; when transferring the second shield all his debuffs are cleansed. An unblockable small area of effect five-second Time Bomb is generated on the wives once the shield is successfully transferred.
Special Phase 70%/40%:
- A message warns “Jang Ghibu needs love.” Jang Ghibu will jump into the middle and call his wives to him; they will stop whatever they are doing and jump to his sides, and once they land Jang Ghibu casts a field-wide Frost Prison, iframe it or remove it with Second Wind.
- Jang Ghibu gathers energy and unleashes a field-wide unblockable area of effect love pulse that inflicts three consecutive hits while the wives to his side perform a dance. Use your iframes when the swirl effect starts to appear around his body. After the first area of effect, the wives will heal back to full health and return the shield to him.
- Jang Ghibu casts his 3-hit area of effect again; this time the wives will spin around the room inflicting Aerial and bounce along the room's edges back to their starting location.
Following this, Jang Ghibu switches rotation and the wives continue their own rotation. The wives must then be re-damaged back to 70% to transfer the shield from the boss to them.
Coordinate with the party on which of the Blade Master/Blade Dancer, Force Master/Destroyer, and Assassin/Summoner should use their party iframe on what segment of the attack.
Special Phase 20%:
After 20%, every 30 seconds Jang Ghibu only casts 3-hit area of effect once, while the wives spin around bouncing around inflicting Aerial and heal completely, but don't transfer back the shield.
Defeating Mengwol and Muwol:
Once Jang Ghibu is defeated, both wives will lose their shield and become Dazed for a while. The two can safely be defeated afterwards in order to progress.
Normal Mode Differences:
- Special Phases occur at 70% and 30%, instead of 70%/40%/20%.
- Jang Ghibu’s 3-Hit AoE is only done once instead of twice, however Mengwol and Muwol will continue to spin.
- Killing Mengwol or Muwol before Jang Ghibu will cause him to do his enrage attack, but this simply does damage that can be iframed instead of wiping the party. If one of the wives die, Jang Ghibu permanently loses their buff shield.
Corridor:
Lots of Gunner, Spearman, and Shieldbearer mobs in the way. If there is an Assassin, let them use Lotus of Rescue to teleport the party past the trash; wait for them to respec to Fighting Spirit before moving on.
Ahead is a miniboss, 1,118,000 Normal HP / 1,800,000 Hard HP Force Master Detector, and behind him is a fire wall. He spawns numerous automatons that pinball around the room, so lure him to one of the gaps on the walls which they can't reach. In addition to frost attacks, at 70% and 30% health, Detector casts Frost Prison when announcing "We are invincible!" then summon four self-destructing automatons.
After the Detector is down, all the automatons will self-destruct.
Ahead there are numerous steps that are scaled with windwalking. At the top is a lever that spawns a Dragon Pulse for the rest of the party to skip the steps.
Iron Juggernaut:
Normal HP: 11,946,000
Hard HP: 18,100,000
Enrage: 6:00
CC: 2x
Rotation:
Many of this boss’s attacks closely resemble Ironsides’ from Talus Dungeon and Ironheart from Mushin’s Tower Floor 14.
- Targeted swipe, blockable.
- Two frontal drills with a very small area of effect, inflicts Knockdown, blockable.
- One of the following:
- Fires a linear blockable rectangle spray of bullets in front of it inducing Knockback and Daze.
- Fires a long unblockable linear laser in front of it inducing Knockback and Knockdown.
- Fires a linear blockable rectangle spray of bullets in front of it inducing Knockback and Daze.
- Unblockable area of effect electric pulse inducing Knockback and Knockdown. Can be CC'd.
If Iron Juggernaut is Knocked Down, it will fire a unblockable area of effect electric pulse and get back up, inducing Knockdown.
If the tank 5 meters or further away, Iron Juggernaut performs an electric projectile pull. If this succeeds, Iron Juggernaut curls up and slams the ground, producing a field-wide unblockable shockwave.
Special Phase:
After 15 seconds since the start of his rotation, Iron Juggernaut enters a mechanic:
- A message warns “Recovery Automatons are repairing Iron Juggernaut.” Three Recovery Automaton with 2x CC Bars are summoned in the corners and will heal Iron Juggernaut. Kill them immediately. Iron Juggernaut will keep doing its rotation.
- Once the Recovery Automatons are dead, a message warns “Detecting failure, Attack Automatons have arrived” and three Attack Automaton with 1x CC Bar are summoned, and try to jump to Iron Juggernaut's tank if not touched. Kill them immediately; on death, they drop a shield, two of which are are needed to succeed the mechanic. They will eventually try to self-destruct, and if they do so they won't drop a shield; use CC to stop them from self-destructing. One person should be up one of the ramps for the next part, while the two shieldbearers proceed up the other ramp with the locked exit but don't head up all the way yet.
- After 15 seconds since the Recovery Automatons were spawned, a message warns “Iron Juggernaut has transformed for an all-out attack.” Iron Juggernaut curls up and becomes immune to attacks, and then targets the furthest person and fires three missile volleys that leave flaming puddles. The marker should slowly head down the ramp as the missiles are being fired; at the same time the shieldbearers should make their way to the top of the other ramp.
- Another trio of Recovery Automatons will spawn.
- Iron Juggernaut re-targets the furthest person and fires three lightning pellets at them. The previous marker that was kiting the missiles should already be at the bottom of their ramp by this time, so that the next mark goes to the shieldbearer. The shieldbearer must press 1 button to block the pellets while heading down the ramp. The block window is 0.8 seconds. After blocking all the pellets, they must then throw their shield at Iron Juggernaut, dealing 601,260 damage per pellet successfully blocked and stacks the Jolt debuff.
- Iron Juggernaut then re-targets the furthest person and fires two unblockable long-ranged linear laser beams. This won't hit you if you're standing right next to the door.
- Iron Juggernaut then re-targets the furthest person once more and fires three lightning pellets, which once again must be blocked by the second shieldbearer, and then thrown at Iron Juggernaut. On at least 5 stacks of Jolt from a combination of five or more blocked pellets from both shieldbearers, Iron Juggernaut collapses and receives a Knockdown for 5 seconds, ending the mechanic.
- There is a glitch that, if Iron Juggernaut collapses at the same time it tries to prepare its next attack, it will curl back up and remain unattackable until after its Knockdown status ends.
- There is a glitch that, if Iron Juggernaut collapses at the same time it tries to prepare its next attack, it will curl back up and remain unattackable until after its Knockdown status ends.
- Iron Juggernaut slams down three times with pauses in between, producing a field-wide unblockable shockwave. Iron Juggernaut still cannot be targeted at this time. After the shockwaves, Iron Juggernaut will uncurl, and can be CC'd while doing so.
Normal Mode Differences:
- Recovery adds spawn at 75% and 35% of Iron Juggernaut’s health, and Iron Juggernaut immediately curls up at 70% and 30%, instead of being based on time. With high DPS groups it's possible to force the curl before or at the same time the Recovery Automatons spawn, giving almost no time to kill the adds and gather two shields before the lightning pellets are fired, and making him arguably more difficult than his Hard Mode version. If this becomes a problem, hold DPS for a bit.
Corridor:
Lots of Combat Automatons in the way; watch out for the Guard Automaton siren patrols, who use an electric pull and activates the nearby automaton turrets. Let the Assassin use Lotus of Rescue, however the last two of three siren patrols have True Sight so be careful.
Take the Dragon Pulse to the final segment. Here are more siren patrols and automaton turrets, along with blue stun lasers and red instant death lasers. Pulling the lever at the end of this segment despawns the lasers and automatons.
Lord of the Flame:
Normal HP: 43,956,000
Hard HP: 66,600,000
Enrage: 8:20
CC: 2x
The Infernal Lord revived with its flame power intact and refitted with a new lightning power; it is much more stronger and faster thanks to its newfound strength. It proves as the first true challenge for endgame, with a complex mechanic that easily spells doom if failed; coordination is key to surviving and winning this fight.
Despite it’s dauntingly high health, the Lord of the Flame is heavily damaged through player buffs and mechanics.
Rotation:
- A frontal claw swipe in a cone inflicting Knockback, Daze, and Ember.
- One of the following:
- A frontal claw swipe in a cone inflicting Knockback, Daze, and Ember.
- A rear 180 degree claw swipe in an arc inflicting Knockback, Daze, and Ember.
- A frontal claw swipe in a cone inflicting Knockback, Daze, and Ember.
- After 90%, Lord of the Flame throws a 5-second Time Bombs at the first person who attacked it after completing his mechanic; after 60% it will throw two. These bombs must be lured away from the party as they have a unblockable area of effect explosion inflicting Aerial to the carrier and Knockdown to others, and Ember to both.
- Two-hit spin, second hit inflicts Knockback and Knockdown, and both hits inflict Ember. Can be CC'd.
- Long-ranged unblockable linear flame breath.
- After 30%, Lord of the Flame does a field-wide unblockable area of effect roar inflicting Stun and detonates Ember stacks for massive damage. This attack comes out fairly fast, so be prepared to iframe.
If Knocked Down, Lord of the Flame does a quick get-up unblockable area of effect ground pound.
If the tank stands 9 meters or further away:
- Lord of the Flame throws four fire projectiles in the order of who hit him when engaging. All projectiles are unblockable.
- Throws a second set of four fire projectiles.
- Spits a fireball that leaves a large flaming puddle.
Special Rotation:
Periodically, Lord of the Flame will enter a new rotation in the middle of his standard one, and won't stop to do anything else until after this rotation is completed:
- Lord of the Flame jumps to the furthest person, creating a unblockable area of effect slam on landing, inflicts Knockback, Knockdown.
- Lord of the Flame throws three 5-second Time Bombs at the first three people who attacked it since engaging.
- There is a glitch that, if a Warlock's Soulburn wears off as the Time Bombs are ticking down, the Time Bombs become invisible. Soulburn should be cast at the start of the fight to prevent this.
- There is a glitch that, if a Warlock's Soulburn wears off as the Time Bombs are ticking down, the Time Bombs become invisible. Soulburn should be cast at the start of the fight to prevent this.
- Lord of the Flame spits fireballs that leave large flaming puddles on the people who carried the Time Bombs in the order of receiving the Time Bombs. Avoid putting these in the middle, and don't charge in until he is in the spitting animation.
- Lord of the Flame does a field-wide unblockable area of effect roar inflicting Stun and detonates Ember for massive damage.
Special Phase 90%/60%/30%:
On 90%, 60%, and 30%, Lord of the Flame initiates his mechanics:
- Gimmicks: Lord of the Flame possesses a few nasty instant gimmicks, which may either be beneficial to the party or spell instant death. Each gimmick below is performed three times in each mechanic, unless stated otherwise.
- Watched: A message warns “Lord of the Flame is watching someone” and the boss gazes at someone and marks them. At 90% and 30% it will watch the furthest person from it, at 60% it will watch the closest person instead.
- Electric Sphere: After the first or second watches in a mechanic, Lord of the Flame spawns two electric spheres at the 3:00 and 9:00 position, regardless of where the boss is facing, which then home in on the Marker, and bounce around if they collide on the edges of the field. Touching a sphere will produce the "Micro Current" effect for 45 seconds; two stacks of "Micro Current" becomes "Electric Current", but two stacks of Electric Current causes instant death, skipping past near death state. Iframing the spheres will cause them to phase through you.
- Electric Shock: After the electric sphere (or the watched in the third time of a set), a message warns “Lord of the Flame is preparing a powerful Electric Shock” and Lord of the Flame will throw a blast of electricity onto the marker, which chains up to a fixed number of players within 3 meters of the marker. The chain cannot be iframed, and receiving the chain grants the "Electric Current" buff to the marker and people near them, granting 50% Attack Power and 50% Critical Damage for 45 seconds. However, if an insufficient people do not stand near the marker to "conduct" the chain, the chain hit the marker multiple times, overloading them on Electric Current and kill them instantly.
- Depending on the stage of the chain, two or three people (one of which includes the marker) are required to conduct the chain. These non-marking Conductors are commonly referred to as "2" and "3" respectively.
- At 90% and 30%, the conducting pattern is "2-3-2"; at 60%, the conducting pattern is "3-2-3".
- Depending on the stage of the chain, two or three people (one of which includes the marker) are required to conduct the chain. These non-marking Conductors are commonly referred to as "2" and "3" respectively.
- Grab: After the chain, Lord of the Flame will attempt to grab the closest person and then throw them (does no damage). On a successful grab, it will steal their Electric Current, gaining a permanent damage increase. However, every 2 current transfers will damage Lord of the Flame by 8% of its health (for a total of 32% health on eight transfers), but 9 transfers will immediately trigger an enrage.
- Whoever got grabbed must receive the marker for the next set; if someone with Electric Current receives the marker, they will die.
- Whoever got grabbed must receive the marker for the next set; if someone with Electric Current receives the marker, they will die.
- Ground Pounds: After the second grab in a mechanic, Lord of the Flame produces four ground pounds. The Ground Pounds can be CC'd, but at this time, each of the Conductors will have Electric Current ticking down. The Pounds or CC must be prolonged for at least 6 seconds in order to time-out Electric Current so that they do not kill the next Conductors. To stall the pounds:
- If there is a Destroyer or Blade Dancer in the party, let them Grab/Phantom Grip.
- If there is a Summoner, let them Power Pounce.
- If there is a Kung Fu Master, let them air combo Sky Kick into Meteor Slam. Don't interrupt their air combo if melee.
- If there is a Blade Master, let them air combo Take Flight into Heavenly Dance into Ascend. Don't interrupt if melee.
- If there is an Assassin, let them air combo Sweeping Gale into Volley into Webbing. No one interrupt the air combo or the web will break early.
- If the CC cannot be prolonged, iframe all four pounds. A Blade Master can cast Hongmoon Winged Protector and a Force Master can cast Frost Sheath.
- If there is a Destroyer or Blade Dancer in the party, let them Grab/Phantom Grip.
- Watched: A message warns “Lord of the Flame is watching someone” and the boss gazes at someone and marks them. At 90% and 30% it will watch the furthest person from it, at 60% it will watch the closest person instead.
- Roles: A minimum of four people are required to participate in mechanics to avoid deaths, taking on different roles.
- Marker: The Marker's duty is to receive the "Watched" (ideally around the 12:00 or 6:00 positions due to the Electric Spheres), group up with the Conductors while absorbing the electric chain, and then purposely get grabbed up to eight times in total and feed Electric Current stacks.
- One person is commonly assigned as the designated marker. However, all party members can be the marker, provided they do not have Electric Currents.
- Because the marker will be constantly delivering Electric Currents to Lord of the Flame, it is recommended for the weakest party member to be the designated marker for optimal DPS.
- Because the marker will be constantly delivering Electric Currents to Lord of the Flame, it is recommended for the weakest party member to be the designated marker for optimal DPS.
- One person is commonly assigned as the designated marker. However, all party members can be the marker, provided they do not have Electric Currents.
- Conductor: The Conductor's job is to stand next to the marker so that they do not die to the electric chain.
- Three people are required to Conduct, one person being the "2" conductor and two people being the "3" conductor.
- Tank is commonly associated with the "2" role, although they can perform any role. However it is recommended the tank be a conductor to receive the Electric Current buff as to not lose aggro.
- Tank is commonly associated with the "2" role, although they can perform any role. However it is recommended the tank be a conductor to receive the Electric Current buff as to not lose aggro.
- Three people are required to Conduct, one person being the "2" conductor and two people being the "3" conductor.
- Sphere Interceptor: The Sphere Interceptor's job is to intercept the Electric Spheres so that they do not kill the marker from overloading on Electric Current. There are two methods for assigning the Ball Eater role:
- 4-people: The marker and all conductors each absorb one sphere. This is the most commonly handled method for this role.
- 6-people: The two extra people who are not marking or conducting absorbs two electric spheres each. This method will also give these two the Electric Current buff, but renders them incapable of providing back-up should a marker/conductor fail in their duty.
- 4-people: The marker and all conductors each absorb one sphere. This is the most commonly handled method for this role.
- Anyone who isn’t marking or not their turn to conduct must stand at least 3 meters behind the boss at all times. The conducting range is 3 meters from the marker, if the marker and/or a non-conductor is within close proximity the Electric Shock may hit the non-conductor behind the boss and potentially kill them.
- Marker: The Marker's duty is to receive the "Watched" (ideally around the 12:00 or 6:00 positions due to the Electric Spheres), group up with the Conductors while absorbing the electric chain, and then purposely get grabbed up to eight times in total and feed Electric Current stacks.
- Surviving the Currents Buffs:
- Pay attention to the number of Micro/Electric Currents you and your party members have:
- Two Micro Currents = One Electric Current. Two Electric Currents = Death.
- Electric Sphere = One Micro Current.
- Electric Chain = One Electric Current.
- Electric Sphere = One Micro Current.
- If you have one Micro Current and are about to perform the electric chain, do not grab another electric sphere or you will die.
- If you have one Electric Current, do not get marked or conduct the electric chain or you will die.
- Two Micro Currents = One Electric Current. Two Electric Currents = Death.
- Pay attention to the number of Micro/Electric Currents you and your party members have:
- 90%/30%:
- Lord of the Flame jumps to the middle, producing a unblockable area of effect slam on landing.
- Boss will then "watching someone", marking the furthest person from it. The designated Marker should be standing away and receive the marker, and ideally stand at the 12:00 or 6:00 position.
- Boss spawns two electric spheres on the 3:00 and 9:00 positions, regardless of where the boss is facing, that move toward the marker and bounce back if they hit the wall.
- In a 4-people Sphere Eating group, both the Marker and 2 must absorb one sphere. In a 6-people Sphere Eating group, the two extras who are not marking/conducting both take one sphere in their place.
- In a 4-people Sphere Eating group, both the Marker and 2 must absorb one sphere. In a 6-people Sphere Eating group, the two extras who are not marking/conducting both take one sphere in their place.
- Boss throws a chain of lightning at the marker and grants Electric Current buff. This has a 3 meter area of effect on the marker that chains to other players. Two people, including the marker, must huddle up and share this, no fewer or the marker dies instantly.
- The Marker must stand at least 2 meters in front of the boss; 2 must stand just behind them. Everyone else stand 3 meters behind the boss.
- The Marker must stand at least 2 meters in front of the boss; 2 must stand just behind them. Everyone else stand 3 meters behind the boss.
- Boss tries to grab closest person. He will steal their Electric Current buff, also gaining a permanent increase in attack power, and then throw them (does no damage); the designated marker must be the one to get grabbed, otherwise anyone else without Electric Current must be the marker instead.
- Boss jumps at the tank. Ideally the boss should be kept in the middle.
- Boss marks the furthest person again, so designated marker stays far away to receive it.
- Boss spawns two electric spheres again.
- In a 4-people Sphere Eating group, both 3s must absorb one each; neither of these spheres must not touch the designated marker due to their Micro Current or they will die in the next step. In a 6-people Sphere Eating group, the two extras who are not marking/conducting both take one sphere in their place.
- In a 4-people Sphere Eating group, both 3s must absorb one each; neither of these spheres must not touch the designated marker due to their Micro Current or they will die in the next step. In a 6-people Sphere Eating group, the two extras who are not marking/conducting both take one sphere in their place.
- Boss performs a lightning chain on the marker. This time three people are needed to share.
- Again marker stands 2 meters in front of the boss, and the 3s standing behind them, with everyone else 3 meters behind the boss.
- Again marker stands 2 meters in front of the boss, and the 3s standing behind them, with everyone else 3 meters behind the boss.
- Boss grabs again. Boss hurts himself by 8% of his health for every 2 lightning transfers, or 32% for 8 transfers in total. But if he absorbs 9 he will immediately enrage.
- Boss performs four field-wide unblockable ground pounds. This is CC'able.
- Boss marks the furthest person.
- Boss doesn't summon spheres and goes straight to lightning chain. Two people are needed to share once more.
- Once again, the Marker and 2 must share this, as the first time.
- Once again, the Marker and 2 must share this, as the first time.
- Boss grabs again.
- Boss does an field-wide unblockable area of effect roar.
- 60%:
- Similar pattern to 90%, except the marking is the closest person and the number of people for lightning is 3-2-3.
- If the party has mediocre DPS with Lord of the Flame having above 40% HP at this point, it is recommended to avoid the 6th grab. This is because the post-30% standard rotation is the most dangerous due significantly increased damage from the 8 stacks of Electric Current as well as the fast field-wide area of effect unblockable roars. If the 6th grab was avoided, the remaining grabs will hurt Lord of the Flame for 14% of its health as opposed to 8%, making the post-30% rotation more manageable.
- Do not attempt to avoid the 6th grab if Lord of the Flame would immediately initiate the 30% mechanics without the current damage. This is because the designated marker will still have an Electric Current and die if they receive the marker.
- Do not attempt to avoid the 6th grab if Lord of the Flame would immediately initiate the 30% mechanics without the current damage. This is because the designated marker will still have an Electric Current and die if they receive the marker.
In the event people die, and there is no Summoner/Soul Fighter to cast Farewell/Slipping Lotus to revive them or they cannot use revival charms, the tank can stand 8 meters from Lord of the Flame and kite him around while the others revive the fallen. Lord of the Flame runs very slowly to catch-up but enough for the tank to stay under the "too far" range. This can only be done in his normal rotation.
Normal Mode Differences:
- Mechanics occur at 70% farthest marker and 30% closest marker instead of 90%/60%/30%.
- No Electric Spheres spawn.
- All Electric Shocks only hits up to one extra person.
- During mechanics, Lord of the Flame does not jump to the tank and do another set of marking and grabs; after the first grab it will skip to the four ground pounds. As such, Lord of the Flame will only grab twice per mechanic, up to four times in total.
- 2 stacks of Electric Current on players will simply detonate the buff for very high damage rather than instantly killing them.
- No Electric Spheres spawn.
- After the first mechanic, only one time bomb is thrown in its rotation instead of two, and no roar occurs. The second mechanic will not add anything to its rotation.