
Sogun, who failed the Divine Mandate Ritual 30 years ago, is resurrected by a mysterious mastermind known as Zulia. Sogun's anger and regret manifested into this flame and frost monster known as Asura.
Requirements/Recommendations:
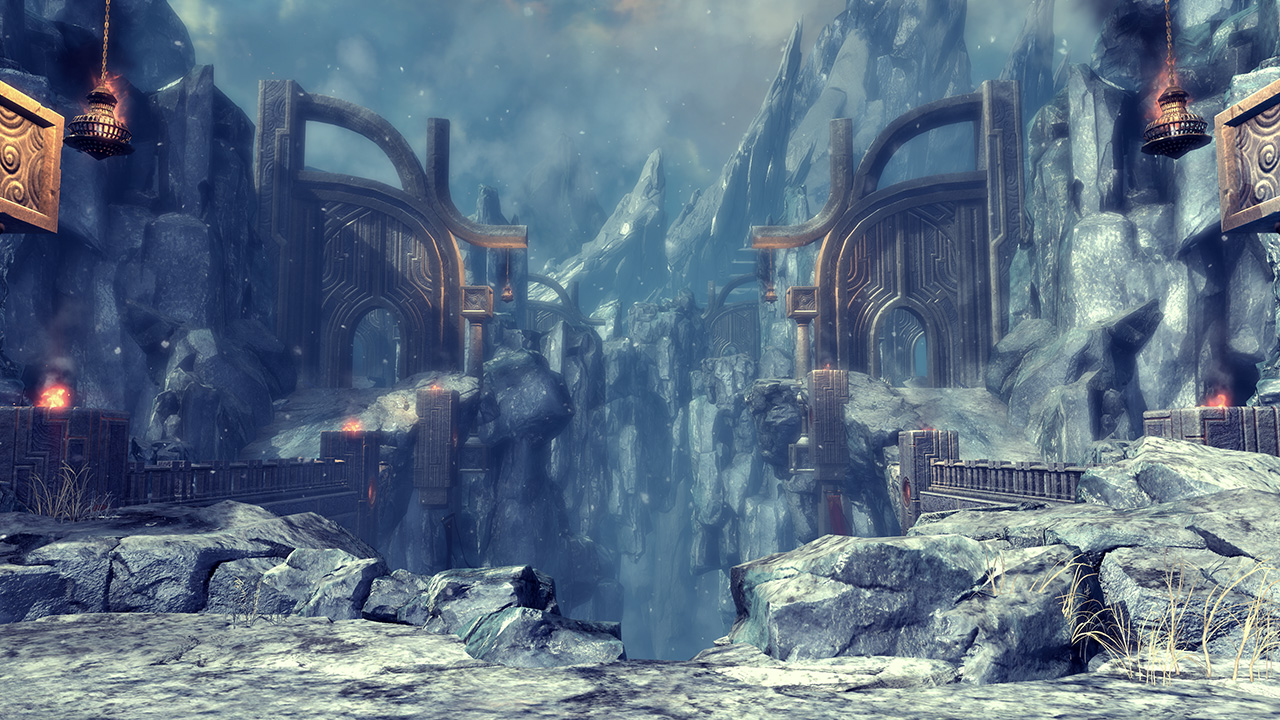
- Act IV, Chapter 10: The Gates Open
- (Recommended) Attack Power 450
- 120% Accuracy
- Up to 3 sets of 2x Stun and Knockdown, or AoE Stun and Knockdown
- Block/Counter/Parry/Deflect skill for the final boss.
- Dungeon Antidotes
- Asura Ember - Unlocks a Hongmoon Skill
- Petal of Lament - 10 Petals combines into Flower of Lament
- (Sealed) Flower of Lament - Mainstream Legendary Baleful/Seraph Stage 1 upgrade material
- Asura Soul
- Shadovv : Writer
- Praetor19 Jade Palace of Grief Showcase
- AeonWcs Sogun's Lament Guide
Corridor:
At the beginning is a daily questgiver that asks to obtain 20 Guard Tags from the normal mobs in this corridor.
The beginning splits into the two paths: the northern (left) path containing Goldkin using flame Force Master attacks, and the southern (right) path containing Silverkin using frost Force Master attacks. Both paths contain various additional monsters, and the Gold/Silverkin are accompanied by miniature versions using Kung Fu Master attacks. The adds can be reset by running up the ramp and then gliding back down.
Each path is divided into four sections, with snowballs falling down the first three sections that will disappear when engaging the Gold/Silverkin. At the end of the first three sections, a lever can pulled after killing the Gold/Silverkin that will open the door on the other path. The final section simply requires killing the Gold/Silverkin at the end.
Ken & Gen:
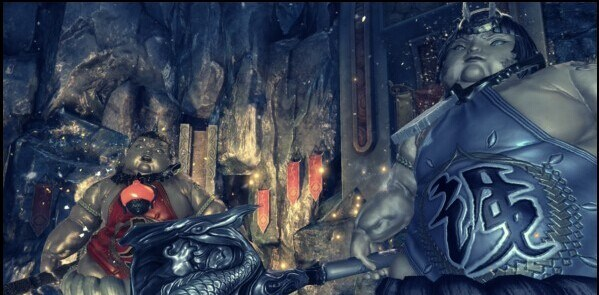
Ken HP: 5,690,000
Gen HP: 3,030,000
Enrage: 7:00
CC: 2x
Both bosses are fought on opposite sides of the room. When the boss is started, the river in the middle will become active and kill anyone entering it, preventing players from moving between the sides. It is possible to maneuver across this river using iframe skills, but in most situations is not necessary.
Ken's Attack Pattern:
- Double 180 degree frontal hammer swings, blockable
- Frontal roar inflicting knockback and daze, blockable
- Double frontal hammer smash inflicting knockdown, blockable
- One of the following:
- AoE spin, blockable, cannot be CC’d.
- Frontal hammer thrust, causes knockback and knockdown, blockable, cannot be CC’d.
- AoE spin, blockable, cannot be CC’d.
Gen's Attack Pattern:
- Double 180 degree frontal hammer swings, blockable
- Puts away his hammer then spins around and deflect stuns if hit into, followed by a palm smash that knocks back and dazes. The palm smash can be blocked.
- Frontal palm flurry, each hit knocks backwards slightly, blockable
- One of the following:
- AoE spin, blockable, cannot be CC’d.
- Frontal hammer thrust, causes knockback and knockdown, blockable, cannot be CC’d.
- AoE spin, blockable, cannot be CC’d.
If their tanks stand 9 meters or further away, Ken/Gen will throw two jars at their aggro holder, leaving a puddle that inflicts a 50% movement speed debuff for one minute. They then jump on the aggro holder, creating an unblockable AoE where they land.
Deva Strength:
Every 30 seconds, Ken and Gen perform a long-ranged area of effect shout. It does no damage, but produces "Golden Deva Strength" and "Silver Deva Strength" buffs for one minute on everyone, both themselves and players, and is granted even on iframe. "Golden Deva Strength" grants 90 Attack Power, while "Silver Deva Strength" grants 10% Defense, both stacks up to 3 times. Additionally, it produces a one minute 50% movement speed reduction on players if not iframed.
After the shout, Ken and Gen will throw two jars at the furthest person from them (i.e. across the river). Ideally, a ranged class should hang around the wall so that they do not hinder melees. Afterwards the pair will resume normal attacking.
Four stacks of Golden/Silver Deva Strength turn into "Galvanized" and "Silver Deva" respectively. For Ken/Gen, this grants them both 90% damage reduction for one minute, but prevents them from stacking Strength buffs. For players, this turns into a one second unavoidable lockdown that then transition to a knockdown inflicting massive damage.
To prevent Galvanized/Silva Deva, the bosses must be knocked down when at 3 stacks of Deva Strength. They will do a get-up attack, then jump across the river, removing their Deva Strength buffs; the knockdown must not be interrupted with a grab, aerial, Blade Master’s Soaring Falcon Move 2, or Assassin’s Webbing or they will not jump. They will then Phantom Grip their tanks, removing their buffs as well, before attempting to smack and slam them into the ground which deals very high damage. The two bosses must be stunned or dazed so the tank does not die. The tank must not iframe the grab and the rest of the party must not knockdown or the boss will jump back over.
There are two strategies to defeat Ken/Gen:
- Split the party evenly: The safest and slowest method, split the group evenly.
- All on one: All party members stationed at Gen. Ken will jump over; burst the two down quickly, preferably with Gen going down first due to his Silver Deva Strength. This method is only for groups with high DPS, as it relies on bursting down both bosses before they gain the damage reduction buff.
Corridor:
Ahead is another daily questgiver asking to defeat the three Iruga's Shadow gatekeepers ahead.
Drop down into the underground tunnel. There are three segments with Kung Fu Master, Force Master, and Shieldbearer mobs patrolling. An Assassin Move 3 Smokescreen, Lotus of Rescue, and Smokescreen again to stealth the party past the mobs.
At the end of each segment, six Shieldbearers spawn, and drop a shield on death, pick up that shield. The miniboss, Iruga's Shadow, will spawn after the Shieldbearers are dead and throw four projectiles at random players, twelve projectiles in total. Press 1 while holding the shield to create a 3.0 second reflect window that damages the Shadow by 1/12th of its health.
Charged Iruga:
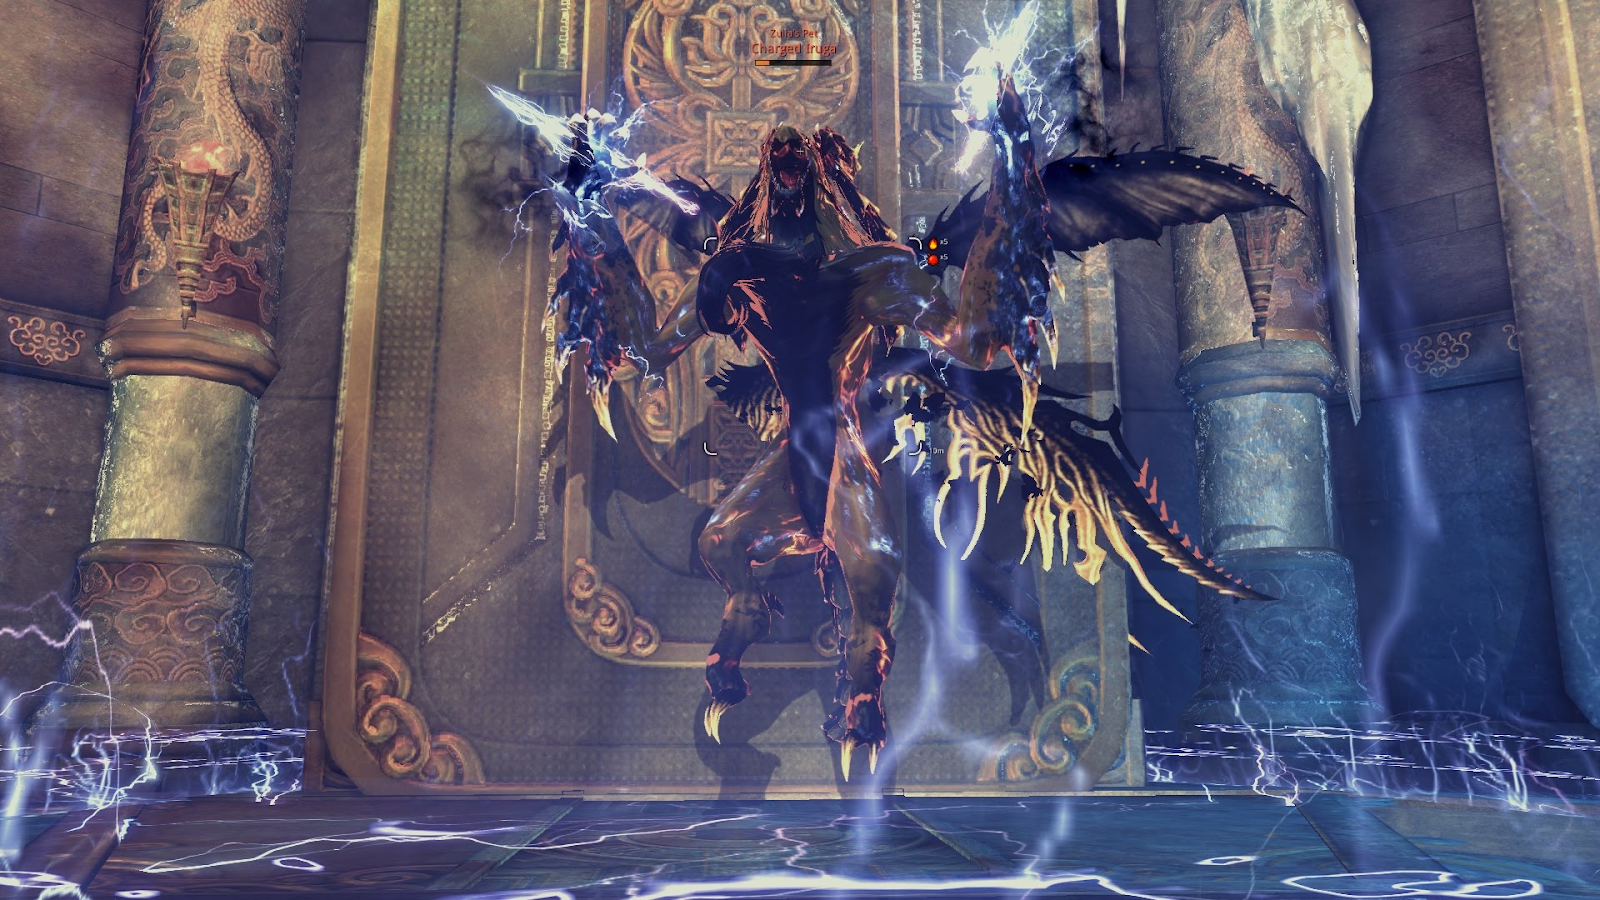
HP: 12,600,000
Enrage: 5:00
CC: 2x
Despite Iruga’s unusually high health and low enrage timer, the mechanic will inflict a significant amount of damage to the boss.
Up to three 2x stun and/or 2x knockdown are required.
Attack Pattern:
- Drops lightning in front of it, blockable, cannot be CC’d, has a blindspot in front of Iruga
- Double 180 degree claw swipes, blockable
- Double 180 degree claw swipes, followed by an area of effect lightning causing knockdown, blockable
- Double claw swipes
- Throws two linear lightning channels in front of it, followed by a lightning breath in front of it, each hit causes knockback and daze, blockable
If the tank stands 9 meters or further away, Iruga randomly does one of the following:
- Throws a lightning area of effect projectile inflicting stun. Blockable.
- Jumps at the aggro holder, causing an unblockable AoE slam upon landing that knocks down.
Iruga’s Shadows:
Every 45 seconds, Iruga will enter a mechanic:
- A message warns “Iruga’s Shadows have appeared” and three adds, the blue-colored Staggering Umbra and green-colored Falling Umbra, spawn in the corners of the room in a triangle formation from each other, with the type that spawns being random. Iruga will continue his normal rotation. The Umbras have the same attacks as Iruga and have unusually high health to kill normally, but the blue Umbra can be killed instantly with 2x stun and the green Umbra can be killed instantly with 2x knockdown.
- Classes with an area of effect CC can group up the Umbras to take multiple down at once.
- Mistakenly using the wrong CC will cause the Umbra to experience that CC, but will resume attacking and be vulnerable to CC again.
- Classes with an area of effect CC can group up the Umbras to take multiple down at once.
- Once the Umbras are dead, a message warns “Snowborn Shieldbearers have appeared” and six Shieldbearers spawn in the middle. Kill them quickly and pick up their dropped shields.
- Iruga jumps to a random corner after the Umbras are dead or 10 seconds after they have spawned, and channels a lightning puddle around himself.
- Iruga fires four lightning projectiles in three sets at the first four people who hit him since engaging. Using the shield, press 1 to reflect Iruga's lightning back to it and produce Spear of Judgement stacks on it.
- Projectile-resistances such as Blade Master’s Warding Spirit, Force Master’s Divine Veil, Summoner’s Petal Storm, and Assassin’s Move 2 Smokescreen can negate the projectiles if the shields weren't picked up in time.
- Projectile-resistances such as Blade Master’s Warding Spirit, Force Master’s Divine Veil, Summoner’s Petal Storm, and Assassin’s Move 2 Smokescreen can negate the projectiles if the shields weren't picked up in time.
- Iruga's lightning puddle disappears and he will begin to channel an unblockable AoE attack. The tank must press LMB to throw the shield at Iruga as he is channeling the attack. This will inflict knockdown for 5 seconds if he has any Spear of Judgement stacks, and detonate the stacks for 1.25% of its health per stack for 15% in total, along with extending the duration of the knockdown by 0.5 seconds per stack for a total of 12 seconds. Do not grab Iruga immediately; let the knockdown duration tick down before doing so.
Corridor:
A final daily quest ahead requires you to defeat the next four minibosses.
At the top of the stairs is Force Master Head Handmaiden Bing Sangsun, with a pair of Destroyer adds. At 70% she will cast Frost Burst and channel an ice pillar that inflicts Freeze nearby. After she drops down, she will become untargetable, and heads into the arena. She regains her health, and is now accompanied by two Gunner and Blade Master adds. On initiating any of the minibosses in the arena, a ring of Palace Cores spawn in the outer edges of the field and shoot projectiles at anyone within range.
Once Bing Sangsun is defeated, another miniboss appears, chosen at random:
- Head Servant Bing Yusang: Force Master who spawns timed exploding ice flowers.
- Misol: Banshee, accompanied by six Cursed Frost Banshees.
- Copperkin: Force Master Training Dummy
After the second miniboss is defeated, a third one appears, again chosen at random:
- Slavedriver Hwa Mayum: Force Master
- Poacher Sang Gyuk: Dual Axe user
- Oh Rutega: Blade Master Training Dummy, grants an achievement on defeat.
The fourth, final miniboss follows the third, once again chosen at random:
- Necromancer Bing Muha: Force Master
- Sculptor Hwa Yunhong: Force Master with eight Terracotta Warriors
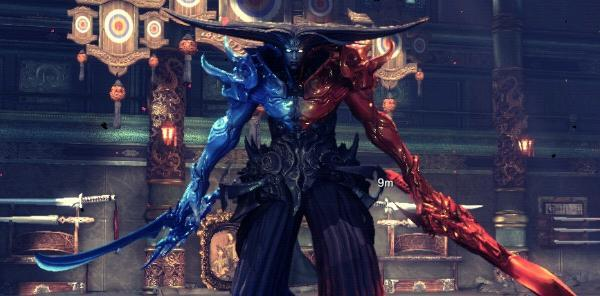
Volcano & Glacier:

HP: 1,750,000 each
Enrage: None
CC: 2x
On initiating the fight, a ring of Palace Cores spawn in the outer edges of the field and shoot projectiles at anyone within range.
Attack Pattern:
Both birds share the same rotation with one difference:
- Targeted peck, blockable
- Targeted upward head swing which will knockup, blockable
- Creates frontal 180 degree gusts, unblockable, each hit causes pushback.
- After 90%, Volcano casts an unblockable AoE explosion around itself, and Glacier summons ice flowers that will explode after a small amount of time, cannot be blocked
If their tanks stand 9 meters or farther away, they charge at them, inflicting knockback and knockdown.
Flight:
At the start of the fight, one of the birds chosen by random will come down to fight, while the other stays flying and untargetable. The flying bird will mark the closest person to them, and fire area of effect feather projectiles: Volcano's leaves a burning puddle, while Glacier's inflicts Knockdown. Blade Master’s Warding Spirit, Force Master's Divine Veil, Assassin's Move 2 Smokescreen, and Summoner's Petal Storm can be cast to negate the projectiles.
They will switch when the first bird reaches 90%, the second bird reaches 60%, and both come down when the first bird reaches 30%.
Asura:
HP: 11,210,000
Enrage: 8:20
CC: 2x
Attack Pattern:
- Double 180 degree frontal sword swipes, inflicting one stack of ember and chill, blockable
- One of the following:
- Linear ice cleave inflicting freeze, blockable, cannot be CC’d.
- Three-hit spin inflicting ember and chill, both are blockable.
- Linear ice cleave inflicting freeze, blockable, cannot be CC’d.
- Double frontal sword swipes
- One of the following:
- Flame energy wave, inflicting ember, knockback, and daze, cannot be CC’d.
- Frontal 180 degree sweep with the frost sword, followed by a frontal flame cleave inflicting knockdown, and a double sword attack causing knockback and daze, all hits are blockable
- Flame energy wave, inflicting ember, knockback, and daze, cannot be CC’d.
- One of the following:
- Frontal linear frost kick, inflicts knockdown
- Frontal 180 degree leg sweep, inflicts knockdown, unblockable
- Frontal linear frost kick, inflicts knockdown
If the tank stands 9 meters or further, Asura teleports behind them and stabs them with his frost sword, inflicting Chill.
Lifeblooms:
Every 30 seconds, a message warns “Lifeblooms are appearing near Asura” and six flowers will appear on the floor. Asura will teleport to a random corner and perform a summoning animation, then does a field-wide unblockable Phantom Grip and absorbs any Lifeblooms on the ground and heal 5% of his health per lifebloom and gain a permanent stack of “Living Flower”; if he has 5 stacks Asura will enrage and wipe the party.
Running into the Lifebloom will remove them, heal around 10,000 HP, grants the Focus Recovery buff for 10 seconds, and grant immunity to Asura's Phantom Grip, but inflicts a 7 second root debuff and a 30 second Thorn Poison damage over time debuff that deals 4,500 damage per 2 seconds. The poison can only be removed with Dungeon Antidotes; class skills such as Force Master's Frost Armor will not cleanse it. Iframes will temporarily stop the damage.
The root can be removed with root removal skills, or approach skills if Asura is able to be targeted. Moving into a Lifebloom with an iframe or having Blade Master's Winged Protector and Blade Dancer's Maelstrom will negate the roots.
Special Phase 90%:
- Asura will teleport to the middle, summoning 4 flaming swords levitating behind him.
- Asura casts a flaming aura around him, which negates projectiles and does very high damage over time on anyone who stands in it. Everyone should stop attacking and group up, Summoners and Warlocks should immediately recall their familiars.
- Asura will fire eight flaming projectiles at random people. Blade Master's Warding Spirit, Force Master's Divine Veil, Assassin's Move 2 Smokescreen, and Summoner's Petal Storm can be cast to negate the damage.
- A message warns “Asura is creating a Flamefrost using his chi” and Asura creates two Flamefrost Orbs that move towards the furthest person from them, and will bounce around the room if they hit the wall. They can be dispelled by block, counter, parry, or deflect skills, which also pulsates the buff "Scorching Heat and Freezing Cold" in a 3 meter area of effect granting 40 Attack Power for 60 seconds and stacks 20 times. One person, ideally a ranged class, should be standing close to the flaming aura and block at least one of the orbs, for the next mechanic. If the orbs are ignored and six are present at one time, Asura will enrage and wipe the party.
- The flaming aura around Asura will disappear. He will then mark the closest person to him, and drop four flaming swords on them one at a time, leaving a flaming aura. The marker should lead the swords away so that they do not land next to Asura.
- Beware that Summoner and Warlock familiars can receive the mark.
- Force Master's Freeze, Summoner's Grasping Roots, and Warlock's Soul Shackle can be cast at the end; if the tank stands behind him, Asura won't do anything until the root wears off.
- Beware that Summoner and Warlock familiars can receive the mark.
- Asura casts a field-wide unblockable Phantom Grip, then does a frontal flaming leg sweep inflicting knockdown and is unblockable.
- Root can also be cast here to delay Asura.
- Root can also be cast here to delay Asura.
Special Phase 70%:
- Asura teleports to the middle, summoning 6 frost swords levitating behind him.
- Asura drops six of his frost swords at random locations three times, producing unblockable area of effect impacts that dazes anyone hit.
- Asura casts a frost aura around him, similar to the flaming aura from before. Everyone should stop attacking and group up.
- Asura creates a pair of flamefrost orbs.
- Asura fires eight frost projectiles at random people. These can be avoided in the same manner as the fire projectiles.
- The frost puddle around Asura disappears. He then casts a field-wide unblockable Phantom Grip, then does a frontal frost linear kick inflicting knockback and knockdown and is unblockable.
Special Phase 50%:
At 50%, Asura will automatically cleanse all debuffs and is immune to debuffs for 5 seconds. He will teleport to the middle, and will periodically cycle between his 90% flame and 70% frost attacks for the remainder of the fight. In addition, Lifeblooms spawn one-by-one during the mechanic, which does not negate his Phantom Grip, and he will absorb the Lifeblooms at the end of the mechanic.