
Credits
Praetor19, Consuume, Soseono, Exteinz for assistance in creating the guide
LB (twitch: whycantigetausernameiwant) for translations
쿠엔크 for providing information about some mechanics
Volmie and Yevvie for providing illustrations
Shadovv for guide corrections
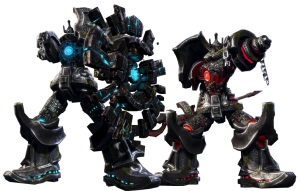
This spire was once said to be the pinnacle of the Naryu, now taken over by a lieutenant of the Dark Lord the Raven King. Form an alliance and storm into the fortress, and reclaim the Naryu lands from a colossal venomous ploggle, the demonic horde, continent-conquering automatons, and your old former clan mate. Within the spire are vast riches to behold, but the dark forces won’t let you take them easily.
Table of Contents
Introduction
Boss 1: Venomsky Drake
Boss 2: Nightfall Generals
Preboss Gauntlet: Corridors
Boss 3: General Moyun and Shuna
Boss 4: The Raven King
Looting
Rewards by Boss
Gear
FAQ:
Introduction:
Skybreak Spire is the first true 12-man raid with four powerful bosses, rewarding Legendary Soul Shields, Legendary Elemental Accessories, and an upgrade to your Baleful or Seraph legendary weapon that turns it into the Raven weapon.
Skybreak Spire has a weekly lockout until the weekly quest reset (can be viewed in the minimap clock icon; resets on Wednesdays at 12:00PM UTC in North America and 6:00AM UTC in Europe); the weekly limit can be reset in your character menu with 10 Khanda Vihar Resets, from the Hongmoon Store or events, and 30 gold in your inventory.
The dungeon is divided into four phases for its four bosses, and you may only clear each phase once before reset. The lockout occurs on clearing the first boss, and you are given a dungeon number that only allows you to run with members of the same alliance. If you enter with someone who has already completed the first, second, or third bosses without having done it yourself, the game will mark you as having already completed those bosses, and will prevent you from killing them until reset.
Except for the Venomsky Drake, none of the enemies in this dungeon can be grabbed.
Except for the Raven King’s Punishment attack, none of the enemies have visible attack indicators.
Requirements:
Must have completed Chapter 5 of the Khanda Vihar storyline.
Recommended Gear:
At least 25,000 DPS is needed to clear the dungeon. The last boss requires a few people with 38,000.
2000+ accuracy to prevent missing, Stage 6+ Baleful/Seraph weapon, Stage 6+ Hongmoon Soul, 8-piece Midnight Skypetal Plains Soul Shield or 5-piece MSP + 3-piece Xanos, Oath Necklace, Awakened Xanos Earring. You will also need enough healing to survive, as each boss will deal unavoidable damage to you.
This is all recommended gear, you can do it with less gear with skill and ping.
Recommended Raid Composition:
2 Warlocks, one for each party
3 tanks (one being a Blade Master or Kung Fu Master, another being a Force Master, Summoner, Warlock, or Gunslinger)
2 Fighting Spirits, one for each party (Assassin or Kung Fu Master)
2+ party iframes one for each party (Assassin/Summoner, Force Master/Destroyer, Blade Master/Blade dancer)
2+ healers one for each party (Summoner or Soul Fighter)
Voice chat is highly recommended, if not necessary for the raid.
Make sure looting rule is set to Master Looter
Make sure Warlocks and Summoners do not Gravity Well and Crouching Tiger taunt.
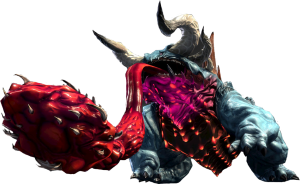
Boss 1: Venomsky Drake
HP: 126,400,000
Enrage: 10:10
CC Bars: 6x
This boss is similar Meganura of the Dawn of Khanda Vihar raid, but with some key differences. Like Meganura, this boss passively takes 50% less damage from all attacks.
Roles:
Tank: Blade Master or Kung Fu Master
Buff Transporter: Force Master or Warlock are optimal, anyone with a ranged attack can do it. This person should be marked so people can see exactly where they are.
Basic Attack Rotation:
When Venomsky Drake does his 3x tail swipe, he should be CC’d (knockdown) to prevent him from dealing massive damage to the party. You can use Summoner’s Power Pounce, but avoid using Destroyer’s Grab/Blade Dancer’s Phantom Grip as moving the boss is detrimental.
Mites and Poison Removal:
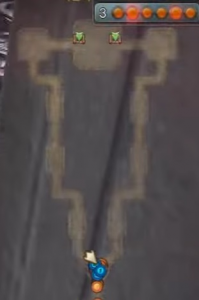
After engaging the boss, a small mite will spawn at the 7:00 position and a large mite will spawn at the 1:00 position. The tank should be tanking at the 7:00 position, and the rest of the party should be at the 1:00 position, at the boss’s back left leg.
The small mite is reserved for the tank, no one else should hit it. It will give the tank a 200% AP buff, and poison immunity for 30 seconds. The tank should either use a ranged skill to hit it (Blade Master) or dash to it and back to the boss quickly during an attack with a long animation.
Blade Masters that are dpsing should not use Hongmoon Soaring Falcon Move 2, as it can hit the small egg if the boss is too close to it.
The only person hitting the large mite should be the Buff Transporter. When they hit the mite, they will get a 5 second buff and an indicator they can see. When that buff expires, a 5m red AoE will appear around them where the indicator was.

Everyone that was in the indicator’s radius when the AoE spawned will have poison removed, and get either a 15 second red buff, or a blue buff (determined randomly) that gives them temporary immunity to poison. If they have no poison stacks, including from having the buff, they will instantly die.


After 15 seconds, red buffs will turn into blue buffs, blue buffs will turn into one poison stack, and poison will start stacking again. Similarly, the red circle will turn into a blue circle, and then the blue circle will vanish.

If you stand in the circle that your buff matches, you will get +100% (double) AP. If you stand in a circle that your buff does not match, you will get -50% (half) AP. If you stand in a circle with no buffs, nothing will change.
Buff Transporter Timings:
The buff transporter should time the poison immunity circles as seamlessly as possible in order to minimize the amount of poison people have to tank.
If the buff transporter gets the red buff, they should hit the mite when there is 5 seconds left on their blue buff.
If the buff transporter gets the blue buff, they should hit the mite when they reach 5 poison stacks (1 poison stacks every 2 seconds).
You can also remove poison stacks on yourself with a Khanda Vihar Antidote, but be careful, if you have 0 poison stacks when the buff is applied, you will instantly die. It’s generally a good idea to use an antidote when you reach around 7-8 stacks.
Add CCs 90/60/30%:
When Venomsky Drake hits the HP thresholds, it will roar, become invulnerable and jump to the center while summoning adds at 12/3/6/9 o’clock positions around the arena. These adds must be 2x CC’d immediately, or there will be a wipe.
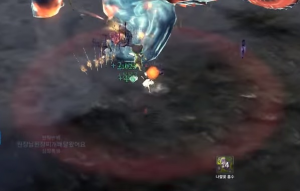
Flowers 80%/50%:
At 80% and 50% HP thresholds, the boss will roar and jump to either 12:00, 8:00 or 4:00 positions.
He will spit 3 poison aoes at the tank before creating flowers and then spitting 4 more. The tank should move in an arc from 6:00 to 9:00 and try to hit the mite during the flower spawning. However, the poison AoE only does damage on landing, but the poison immunity buff will prevent any further damage, so the tank can alternatively keep engaging the boss while lifestealing through the damage.
After three poison AoEs, it will stick its head in the ground and summon flowers that heal him, throw 4 more poison aoes to the tank, roar again and go back to its normal phase.
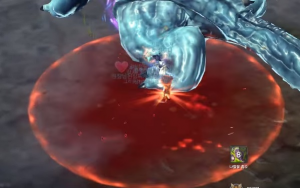
These flowers will heal the boss if you do not remove them. If someone with a red buff steps in a flower, it will start damaging the boss instead of healing it, but their red buff will be removed and they will start taking poison damage. Otherwise you will get rooted.

As red buffs are the only thing that can remove the flowers, the buff transporter should stall the buff when the boss starts this phase. It takes about 20 seconds from when the boss roars to when the flowers start to spawn, so keep that in mind when timing buffs.
Flowers 20%:
Unlike 80%/50%, at 20% HP the boss will not roar and jump, but will start spawning flowers constantly. The buff transport interval should be shortened to 15 seconds instead of 30 seconds, as people with the red buff should be turning flowers red. The buff should also be delayed until just before 20%, so that the flowers are turned red as soon as possible.
WARNING:
If your team has extremely high dps, you may push it to an add phase (60% or 30%) before he starts the flower phase (80/40%). If this happens, he will become invulnerable and float, but the adds will not spawn. If this is a concern, hold off on DPS until flowers spawn.
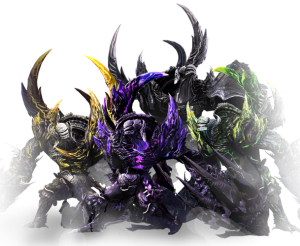
Boss 2: Nightfall Generals
Za Misung/Nok Jasung/Hwang Gusung HP: 12,400,000
Bak Taisun’s Phantom HP: 32,000,000
Enrage: 6:00
CC Bars: 4x
This boss is unique as it begins using the Soul Separation ability seen in the Khanda Vihar storyline, and consists of 5 bosses: the main boss, Bak Taisun; three bosses in the real world, Za Misung, Nok Jasung, and Hwang Gusung; and one boss in Soul Separation space, Bak Taisun’s Phantom.
Roles:
3 tanks one for each real boss (doesn’t have to be Blade Master or Kung Fu Master, someone with high DPS works as they will be the only one hitting the same boss)
9 Soul Separation: These people will be travelling in and out of Soul Separation throughout the fight, put six in one party, and the rest in the other party in each other party.
Basic Attack Patterns: All of the real bosses have the same attack pattern, using attacks from Taikhan.
Water Cannon/Curl+spin -> 2x swipe -> 2x swipe + slam
If the tank gets too far from their boss, it will throw projectiles at the top 4 people on its aggro table.
The phantom has a different attack pattern, incorporating Taikhan’s grab and throw.
This boss is a little odd, as you don’t fight Bak Taisun directly until the very end. When you engage Bak Taisun, it will hide itself and spawn four bosses: the three colored sub bosses in the real world, and an illusion of itself in Soul Separation.
The three real world bosses will each go to their colored circle in one of the zones. The yellow one will go southwest, the green one will go north, the purple one will go southeast, and the illusion will remain in the center in Soul Separation. The core mechanic of this boss is entering and exiting Soul Separation.
Entering Soul Separation:
After they jump to their circles initially, each real boss will select two people to enter Soul Separation, for a total of 6 at the start.
If they are not attacked by anyone other than the tank, they will send people within 8-16 meters from them into Soul Separation. These players should avoid standing in the middle, directly where Bak Taisun was, or they won’t get sent in.
If they are attacked by non-tank players, or have hit them with their initial jump, they will send those people instead.
After jumping to the circle, the boss will do an animation as if they are looking around them, and mark people for Soul Separation. Once they do that animation, everyone can hit them.
Each boss will stack the Annihilation debuff of their color on everyone near them every 2 seconds. Each stack of the debuffs reduces HP recovery by 1%, increases your piercing by 1%, and will deal 5,600 damage every time it stacks. The debuffs only last for 80 seconds before wearing off, but if you reach 30 stacks of a single color you will die.
Some time after they jump to their circles (when people reach 10 stacks on the first set, 20 stacks on every one after that), the boss will stop their current attack and go into a healing animation and heal 1% if it completes. They will keep doing this until they are knocked down. Each one must be knocked down with 2x cc make sure to not launch or use Blade Master’s Soaring Falcon Move 2 or Assassin’s Webbing. They will do a getup attack, then jump clockwise.
When the next color arrives, the only one hitting it should be the marker for soul separation. It will phantom grip its tank, removing their Annihilation stacks, before attempting to smash them for very high damage and should be interrupted by 2x stun. Once the stun wears off, it will either choose the highest DPS person on it, or the closest person to mark for soul separation with the gaze animation (excluding the tank), if the only person who hit is was the marker and they are standing close enough, it should guarantee they get marked. Once it marks, everyone else may start hitting it as the marker moves into Soul Separation.
Soul Separation Mechanics:
When you’re in Soul Separation, you can see actions in the real world, but neither real or soul separation spaces can interact with one another. In the center will be Bak Taisun’s Phantom which you must kill. However, entering soul separation gives you a 90 second debuff, once that expires you will die.
After about every 3 attacks, the Phantom will do a gaze, and mark the three closest people to him. These should be the 3 people who have been in Soul Separation the longest. After marking the three closest with a white ball over his head, he will attempt to heal himself by 1% and resume attacking. Knock him down and each of the marked people should move to their circle (determined ahead of time). The Phantom will jump on each of them, putting them in the real world, and everyone near them will gain a healing buff that overpowers the healing reduction from the debuffs.
The Phantom doesn't always need to be knocked down when he tries to heal, it should be done shortly after the outside bosses are knocked down and the 3 new people enter soul separation. If you don't need to knock him down, just stun him to prevent the heal and he won't jump.
After the jumps, he will jump back to the center and mark the three closest people and attempt to heal himself again. Stun this one, and he will continue his normal rotation.
Once the Phantom dies, everyone will be forced out of Soul Separation, and knocking down the outside bosses will no longer put people into Soul Separation.
Bak Taisun:
HP: 12,600,000
Enrage: 1:00
CC: 4x
While the Phantom can be killed before the other three bosses, the real world bosses cannot die until all of them are reduced to 1 HP and the Phantom is dead. Once every subboss is killed, the real boss will reappear in the center of the room.
The timer doesn’t start until the boss is aggroed, so revive everyone who’s dead and heal up before engaging (if someone is dead in the center they need to stay dead; if there is an Assassin or Soul Fighter put them in the same party as them and have them use Lotus of Escape/Slipping Lotus to pull them out from the center). This boss has no mechanics to it, just the basic attack rotation. Burst him down in 1 minute. If you fail this or reset him, you will have to start from the beginning with the 4 subbosses.
High DPS Strategy:
Requires 60,000 DPS from 6 people
If your party’s DPS is high enough to kill the Phantom before their soul separation debuff expires 90, you can ignore the exiting/entering of soul separation and just burst all four subbosses down. The inside boss should be stunned only to prevent him from healing.
Meanwhile nobody in the real world should be using knockdowns on their bosses; once they start trying to heal they won’t be doing anything else. Once your Annihilation stacks reach dangerously close to 30, simply rotate to another boss.
In order for this strategy to work, you don’t just need high damage but also good hp recovery, as there will be no healing buff provided, and the debuffs will still stack, reducing your recovery and dealing damage.
If knockdowns are used in this strategy, nobody will be available in the real world to save the tanks when they get grabbed.
Preboss Gauntlet: Corridors
Between bosses 2 and 3 there is a switch followed by a room with 2 adds and 2 long corridors. If you have a key from completing the corridors, you can skip the corridors by using one on the switch. If you fail to defeat boss 3 and everyone leaves the dungeon, you will have to clear corridors again.
In the fork of the road are a pair of Chuanka-like adds. If the aggro holder is at a distance they will throw projectiles which can be blocked with ranged protection.
Once they are dead, Lusung will appear. He has 12,800,00 HP and uses Kung Fu Master and Force Master attacks. At 50% he will send half the party into soul separation. After some time he will charge up an attack, people in the real world need to cc him (only real world can apply CCs) which will take everyone out of soul separation. If you kill him before he does his ccable attack, then everyone in soul separation will die after 30 seconds, just resurrect.
After he is defeated, split the raid in half to fight the adds. Each room is guarded by a Devourer-like add, and each room contains Ebondrake Humanoids, Elite Bonemask-like, and Mane-like adds. Each of the large mobs will apply the Tainted Poison debuff dealing 4,500 damage per second and stacks, so lure them to the entrance so you only have to fight one big mob at a time.

All of the mobs are perma-rootable which you can abuse using Force Master’s Frost Palm and Soul Fighter’s Snowball Chill, Force Master’s Force Blast, Summoner’s Grasping Roots, and Warlock’s Soul Shackle.
In the third room once all the normal mobs are dead, a miniboss will spawn at the end of the room with 17,300,000 HP. Once you engage it, a wall of purple fire will appear on the opposite side of the room and start moving across the room. This fire will kill anyone who it touches.
Every 20% HP, the boss will send everyone into or out of soul separation, which will remove the fire wall, he will teleport to the opposite side of the room, and a fire wall will spawn where he was. The tank should move on either the left or right wall, as the boss will throw ranged attacks at the tank that leave large damaging AoEs on the ground.
If you do too much DPS to skip a phase the boss will teleport in-place.
After throwing the AoEs it will charge up a vacuum before knocking everyone back, 8x CC this.
The boss cannot die until the other side’s boss is at 1 HP, but once it hits 1 HP the purple fire will disappear and it will just keep attacking, there is no enrage.
The fifth and final room on each side contains no mobs, but the last miniboss, which behaves similarly to Iruga from Sogun’s Lament. It has 29,500,000 HP and a 3 minute enrage timer.
Ranged classes should be tanking this boss, as it will just throw projectiles if the target is far away, and they can rotate between ranged protection skills. If a melee tries to tank this boss will constantly do knockdown attacks under it.
At 50% HP, the miniboss will send the 3 farthest people on its aggro table to soul separation and spawn a colored add at 3:00 and 9:00 positions. 2x stunning the blue, dazing the red, and knock downing the green will remove them instantly, similar to Iruga adds. People in soul separation cannot CC the adds, so the CCers should make sure to not be the farthest people at those thresholds, or just not hit the boss at all.
Once all the adds are CC’d, people in soul separation are taken out of it. If the adds aren’t CC’d within 30 seconds, everyone in soul separation will die.
Once both minibosses are brought to 1 HP they will die and the door to the third boss will open. Each one drops keys that let you skip the corridors, but only follows normal looting rules by the party that picked it up.
Boss 3: General Moyun and Shuna
General Moyun (Spear General) HP: 94,800,000
General Shura (Shield General) HP: 115,600,000
Enrage: 10:40
CC Bars: 6x
Roles:
1 Melee Tank (Blade Master or Kung Fu Master)
1 Ranged Tank (Force Master, Summoner, Warlock, or Gunslinger)
Aerials: These people should be responsible for knocking the bosses up over the correct lasers. This is commonly the tank's job, both melee and range, but it can be anyone. Assassins are unreliable for this, as they can unintentionally use Webbing on the launched boss which will cause it to instantly drop on the ground.
This area is comprised of two bosses on opposite sides of the room in their own squares, and an instant death zone between them.
Basic Attack Rotations:
Shield General:
This boss requires a melee tank, who should face the general towards the wall. if the tank moves 4 or more meters from the boss, it will gain the Bulwark buff for 5 seconds, making it invulnerable and healing 1% of its health every second. Melee must engage this boss before the ranged tank to prevent Bulwark from occurring. All of the attacks can be blocked or countered.
This boss requires a ranged tank, who should stand at the edge of the square on the inner side. If the tank stands 10 meters or fewer from the boss, he will create an AoE around him for several seconds that deals massive damage to everyone within 10 meters.
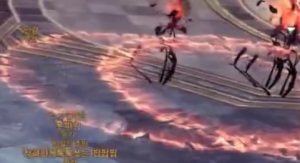
Blue/Red Lasers:
This is the exact same mechanic as Rocnar from Naryu Foundry.
Spear General will start this mechanic before Shield General.
Periodically, the boss will scan 1-8 meters in front of them several times. Anyone hit by the scan will have their aggro reset and gain the Detect debuff that removes 50% focus per second for 10 seconds.. During this the bosses are CCable. A blue laser and a red laser will travel from either the north or the south, and in a random order. Each boss must be 6x stunned and aerialed over either the red or blue laser, and touch the other laser. The lasers will do damage and stun players that touch them, but they can be iframed or jumped over. Avoiding the same colored laser is FAR more important than getting them to touch the opposite colored laser, so make sure you do that.
Assign one person on each side to be the one doing the aerial, this can be the tanks (range tanks can move into melee distance during this). Melees should make sure to not extend the the aerial too long, and not end it too early.
Spear General:
Shield General:
Boss 4: The Raven King
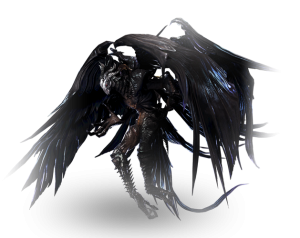
HP: 215,300,000
Enrage: 14:10
CC Bars: 6x
Roles:
Tank: Blade Master or Kung Fu Master, must be on top of their game.
Soul Separation: 3+ people who will do Soul Separation, 3 for the first phase, then individuals for last phase. After the first phase the first group cannot get into soul separation again for the next 5 minutes, so the next group may need to be different.
Basic Attack Pattern:
If the tank stands over 10 meters from the boss, he will jump at them and then cast Punishment. If they are still too far, the boss will do a gesture and the tank will instantly die.
Special Attack Rotation:
During his normal rotation, the Raven King will start this after the first Punishment, then every 2 full rotations after.
His map is very important to keep track of, as understanding its layout helps with mechanics.
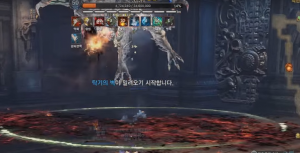
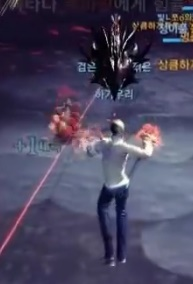
Special Attack Phase 80%/30%:
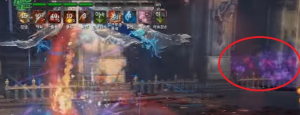
When The Raven King hits these HP thresholds, he will finish his current attack, jump to the center, and fly up into the air becoming untargetable. He will summon three Devourer-like Dark Ghost adds with 6,00,000 HP and 4x CC each at the 12:00, 4:00 and 8:00 positions.
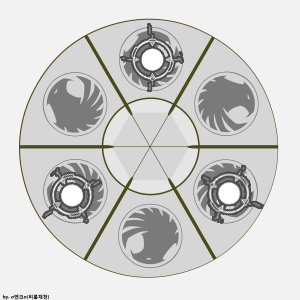
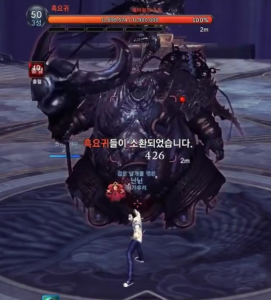
You have 50 seconds to kill these before the raid is wiped. These adds are able to be permanently rooted from Force Master’s Frost Palm and Soul Fighter’s Snowball Chill, Force Master’s Force Blast, Summoner’s Grasping Roots, and Warlock’s Soul Shackle, and should be if possible. If their aggro holders get too far from them they will do an AoE suction on everyone nearby, but if the perma-root is successful they shouldn’t do many attacks.
While you are killing the adds, periodically 2 people closest to the add will be marked with the raven marking, make sure to move away from the group if you have the mark. The Raven King will also constantly throw AoE projectiles at random people that do very high damage, use ranged protection skills to defend yourselves from these.
Once the adds are all dead, the Raven King will come back down in the center, send the 3 farthest people to Soul Separation, and begin his clock rotation. Root the boss to give people enough time to get into position.
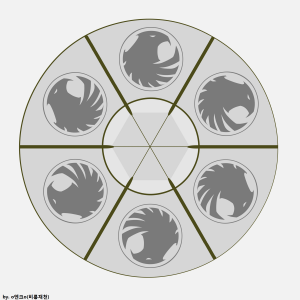
Real World:
Everyone should group up in the wedge at 7:00 aside from the 3 markers for soul separation. The Raven King will turn all but that wedge of the arena black, and anyone other than the tank in that black zone will instantly die. He will constantly recreate this kill zone and will move one wedge clockwise based on the tank’s position. If the tank moves counterclockwise as shown in the gif below, the safe zone will remain constant making the party significantly safer. Put a marker on the tank to make them stand out.
Attack Pattern:
The Raven King has an attack pattern during this phase, when he is facing the party due to tank moving to that wedge, people should be wary of his attacks.
Triple Strike -> Quadruple Strike -> Fire Breath/Spin -> Triple Strike -> Quadruple Strike -> Fire Breath/Spin -> Suction
If the tank stands 10 or more meters from the boss during this phase, the boss will do a gesture and the tank will instantly die.
During the 80% phase, this phase lasts for two full clock rotations or four attack pattern rotations, after which the Raven King will jump to the farthest person and fire breath the tank before returning to his normal pattern.
Soul Separation:
When the Raven King lands, he will send the 3 farthest people to Soul Separation. One person should be in each of the 12:00, 4:00 and 8:00 wedges, at the edge of the arena, they will be sent to Soul Separation before the kill zone is created.
In Soul Separation, there will be 3 Lusung’s Phantoms with 1,710,000 HP each, where the Dark Ghosts were. They will not attack the players, instead they will be stacking the Demonic Energy buff on the Raven King.
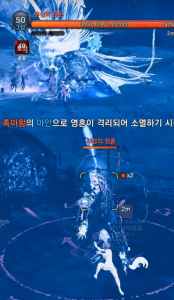

If the buff reaches 100 stacks, the raid will wipe. If you do not have the DPS to kill the Phantoms before 100 stacks are reached, instead coordinate ccs/aerials/grapples so all 3 of the spirits are CC’d simultaneously. The buff only has a duration of 3 seconds, so if all the CCs are coordinated, the buff will reset back to 0.
Once all of the Phantoms are dead, the soul separated people should move back to the safe zone and look for the AoEs dropped by the people with the raven mark. Stepping in the AoE will send you back to the real world. If the soul separation buff just naturally expires after 90 seconds, the soul separated people will die.
Exiting Soul separation will apply a 5 minute Aftereffect debuff that kills you if you try to enter soul separation again, so the people for each phase need to be different.
30% Phase:
This is the hardest phase of the boss, and the cause of the majority of failures on this boss. For this phase, you must have a set one by one order of people to enter soul separation. The first couple people should be your highest DPSers.
Before this phase starts, keep him at 32% for a period of time. Have one or more people assigned to keeping bleed active, but only the tank should be hitting the boss otherwise until all buffs are off cooldown. Once everyone is ready, wait for him to do his jump attack before going in and doing as much damage as possible without using Fighting Spirit and Soulburn before he starts his phase.
Real World:
As far as the real world mechanics go, it’s much the same, however with some key differences. Unlike the other phases, this phase will continue until the boss is dead, or the party is dead. Whenever the boss performs his suction attack, he will immobilize the tank and disable all their abilities for 10 seconds. Every time this happens, the safe zone will move clockwise, and the party must move with it. The Raven King is CC’able while casting the root which doesn’t do anything, so be prepared to alternate stun and knockdown in case.
The kill zone will disappear after two full clock rotations/four attack pattern rotations, but the mechanics will keep going, so keep everything the same.
Soul Separation:
This is where the true difficulty of this phase starts. After the Dark Ghosts adds are dead, instead of sending the farthest 3 people into Soul Separation, he will instead send only the one farthest in at a time every 15 seconds. There will be three Lusung’s Phantoms alive at the start at the 12:00, 4:00 and 8:00 positions as normal, but 3 more will spawn every 60 seconds at the 2:00, 6:00, and 10:00. If 6 are alive simultaneously, the raid will wipe.
The first person should enter soul separation at the 12:00 position. Buffs should be used immediately before they enter soul separation, they will not receive them if they are in soul separation when the buffs are used. This person needs to kill the spirit at 12:00 as quickly as possible, If they cannot kill in under 45 seconds it will likely be a wipe (approximately 38,000 DPS).
The second person will enter Soul Separation after 15 seconds, and they should immediately go to kill the spirit at 4:00, buffs should be used before this person enters soul separation too. Once the 12:00 spirit is dead, the first person should move to help with the spirit at 4:00 too, and once that one is dead, help with the spirits as they keep spawning until they need to exit.
The third person should move to the 8:00 spirit when they enter soul separation and be prepared to CC it.
For every soul separation after the third, people should be moving in a clockwise pattern when they enter, and either wait for new adds to spawn or help kill adds that are currently alive. The exception is the 5th person, who will have to move to the 6:00 spirit. Some people will have to enter soul separation as the safe zone is moving, so they should be very careful.
This is someone difficult to understand, here is a table to help understand where each person should go. If there is a slash, go to whichever add needs help more.
1: 12:00 -> 2:00 (4:00 if time)
2: 2:00 -> 4:00
3: 8:00 -> 6:00/10:00
4: 10:00 -> 8:00/12:00
5: 6:00 -> 4:00/8:00
6: Kill boss
Make sure to coordinate CCs during this phase too, as the boss will still enrage if he reaches 100 stacks.
As the soul separation buff is 90 seconds long, each person should start moving back to the safe zone to exit soul separation at about 10-15 seconds left. Once they exit soul separation, they will get a debuff preventing them from re-entering soul separation. As such, everyone must know what to do here, in case this phase takes a long time and they enter soul separation.
Looting
Loot Distribution Method:
The method loot is distributed is the Master Loot system, as you cannot bid on the loot through the entire raid. When the boss is killed, the raid leader can go to pick up the loot, and this interface will appear.
Warning, if you do not set to master looter, only the party of the person who picks up the loot can bid.
You may link the items in chat, and choose who to give each item to by clicking on the item, clicking on their name, and then the button underneath the names on the right side to give the selected person the selected loot. You can also filter by class to make searching easier.
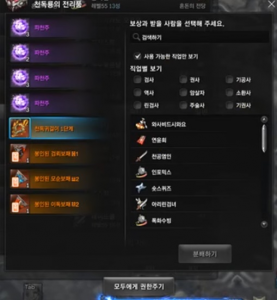
Bids are done in chat similar to a real-life auction. The leader links all the items at the start, then one at a time to start each bid. Usually there is a minimum bid set so people will get gold from bids, and a bid interval set so de facto copper wars don’t occur. This is all up to the individual raid. Once someone wins the bid, they give the assigned treasurer the bid gold (can be the leader or another designated person), and the leader gives them the item.
The treasurer usually distributes the gold at the end of the raid, but some choose to distribute after each boss, although this lengthens a raid greatly.
As long as the interface is open, the loot won't disappear. If the interface is ever closed, then the loot will disappear if it's been 5 minutes since the boss was killed.
Rewards by Boss
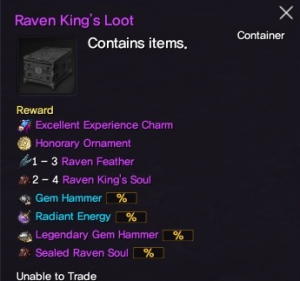
The equipment that you can get from Skybreak Spire is legendary elemental earring and ring, class specific legendary soulshields, and the material to upgrade to the legendary Raven weapon. The bonuses the legendary soul shield provides can be found on Praetor19’s cheatsheet here. The dynamics and weeklies give raven feathers, and the final boss’s dynamic box gives Raven King’s Soul as well as a chance for Sealed Raven King’s Soul. The feathers are used to upgrade the accessories, and purchase soulshields/cosmetics. The Raven King’s Soul is used to upgrade Raven Weapon, or can be transmuted to three Raven Feathers.
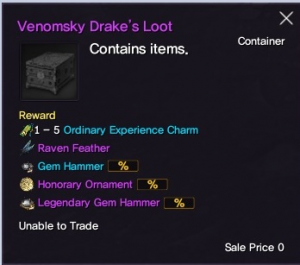
Venomsky Drake:
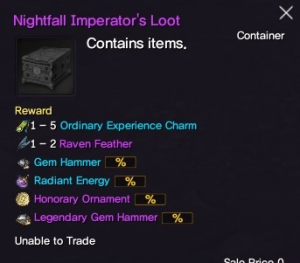
Nightfall Imperators:
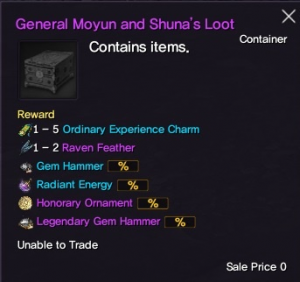
General Moyun & Shuna
The Raven King
Shop:

In order to buy Soul Shields and cosmetics, you need certain achievements. Soul Shields 1-4 require nothing, 5-6 require first boss (Venomsky Drake), and 7-8 require second boss (Nightfall Imperators). The cosmetics require the 10 kill achievement for the boss that drops them, Raven Masks from second boss, Gold Standard from third boss (Generals Moyun & Shuna), and rest from final boss (Raven King).
The legendary primers can infuse up to 401 in their respective stat, and require 5 Masterwork Shield Bases from Soul Warden and 5 Raven Feathers.
Gear
There are four distinct rewards from Skybreak Spire gearwise, legendary elemental earring, legendary elemental ring, legendary soulshield, and the legendary Raven weapon upgrade material.
You will also get Raven Feathers from the weekly quests and from the dynamic box that each boss gives. These feathers can be used to upgrade accessories, purchase soulshields, purchase cosmetics, and purchase the Skyrift/Pulse Badges from Celestial Basin
The final boss drops Raven King’s Soul from its dynamic box and for bidding, which is the material used to upgrade the Raven weapon between stages. They can also be transmuted into three Raven Feathers each. If you don’t think you’ll get the weapon material any time soon, or won’t be able to afford to upgrade it, or if your weapon is maxed out, then transmuting the souls to feathers for other uses is a viable plan. If you want to level your weapon quickly though, save them.
Upgrade Priority:
The earring and soulshields are your most important upgrades if your weapon is not max, if your Baleful or Seraph weapon is max and you have the materials to upgrade it to stage 1 Raven weapon, then the weapon material takes priority.
The earring and ring share a limited upgrade material (Raven Feathers), so you will have to choose which to upgrade if you have both. In all cases, use feathers on the earring instead of the ring. A maxed out earring is significantly more useful than breakthroughs on ring.
Legendary Elemental Earring:
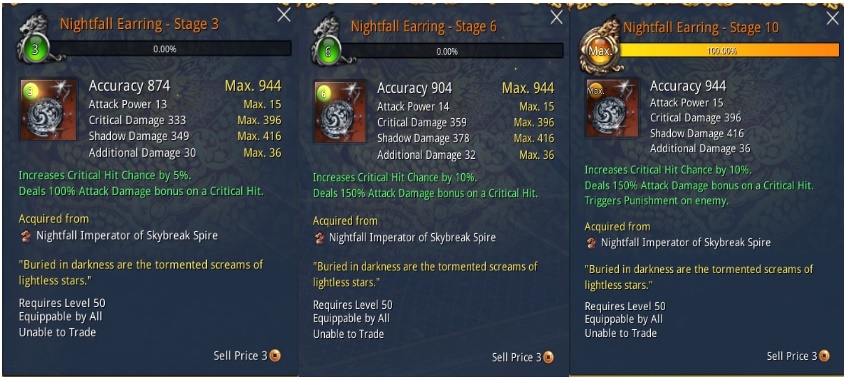
There is an earring for each element, the one shown above is the shadow earring. The only difference between them is the element and which boss they drop from.
The Earring has a high chance to proc “Critical Bonus” buff, increasing Critical Rate by 5% and all critical hits deal 100% Attack Power Bonus. After Stage 4, the buff increases Critical Rate by 10% and all critical hits deal 100% Attack Power Bonus. The buff lasts for 5 seconds and procs extremely often, enough to consider a 100% uptime.
At stage 10 it gains the ability to debuff the enemy with Punishment. This lasts 10 seconds and anyone hitting the target gains “Critical Bonus” which provides 5% Critical Rate and all critical hits deal 100% Attack Power Bonus for 3 seconds. Despite sharing the same name as the Earring proc, these are two separate buffs which can stack their effects.
Legendary Elemental Ring
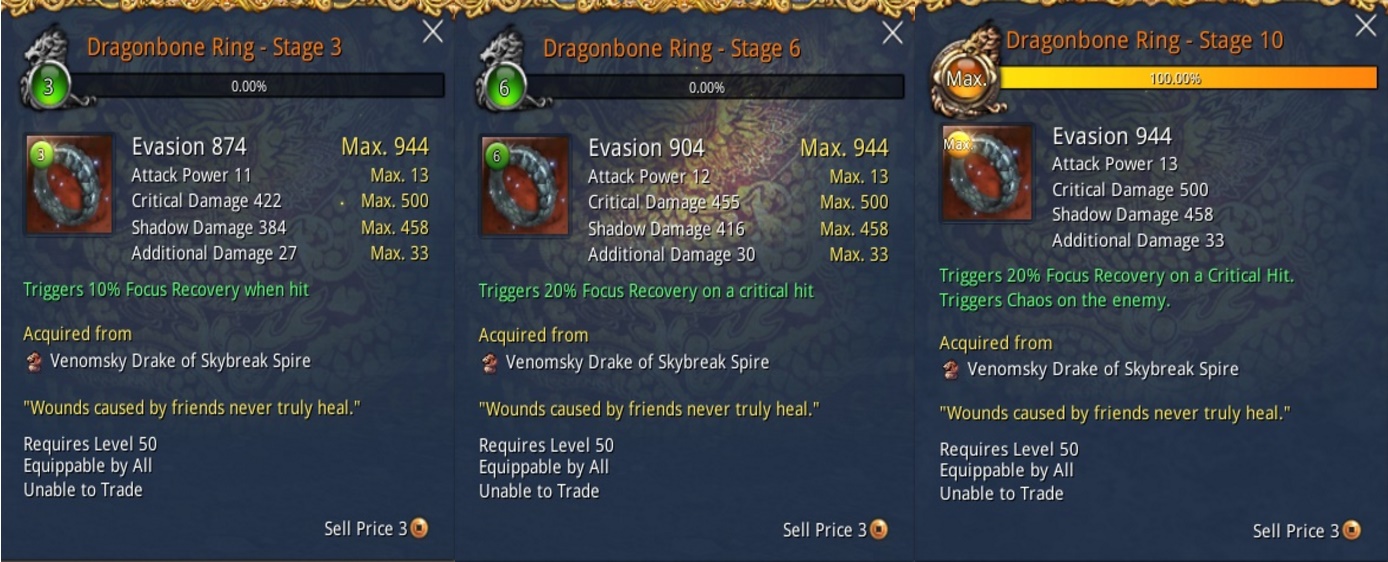
There is a ring for each element, the one shown above is the shadow ring. The only difference between them is the element and which boss they drop from.
The Ring has a low chance to restore 10% focus on critical hit. After Stage 4, the proc restores 20% focus on critical hit. Due to the critical hit condition, as well as the rather low proc rate, the ring is of less importance than the earring.
At Stage 10, it gains the ability to proc the Chaos debuff on the enemy. It lasts 5 seconds and gives 10% focus back to party members who hit the target.
Legendary Raven Weapon Material
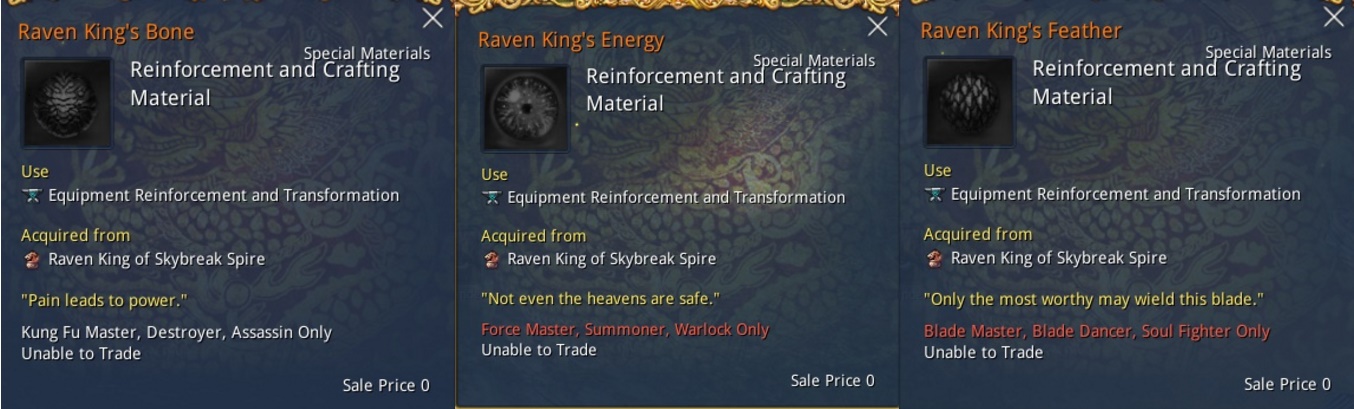
The material to upgrade a stage 10+ Baleful/Seraph weapon to Raven drops from the third and fourth boss, chance for one on the third and guaranteed for one on the fourth. There are three different materials shown above, which material drops is completely random.
The Animus is used for Blade Master, Blade Dancer, and Soul Fighter only.
The Ferocity is used for Kung Fu Master, Destroyer, Assassin, and Gunslinger only.
The Energy is used for Force Master, Summoner, and Warlock only.
The material is useless for the classes that can’t use it, but it is account bound meaning that it can be mailed to another character within the account.
This material is only used for upgrading from Baleful/Seraph or Dawnforged/Riftwalk to Raven weapons, to upgrade between Raven stages instead uses Raven King Souls.
Legendary Soul Shields:
Each boss drops 2-4 soulshields, which ones they drop are shown above. Each soul shield can be for any class, it is completely random; you could have all 4 for one class, or each could be for a different class. These soulshields, like the Midnight Skypetal Plains, give unique modifiers to each class. These modifiers and their stats can be found on Praetor19's cheatsheet.
These soul shields also have a higher maximum infuse limit than the standard legendary primer.
FAQ:
Q: Can I run Skybreak Spire as much as I want?
A: No, there is a weekly lockout.
Q: How does the weekly lockout work?
A: Every raid is assigned a number. Once you kill the first boss, or enter an instance where the first boss is killed, you are locked to that number raid. You cannot enter any other raids on that character until the weekly maintenance.
Q: What if I want to join another raid that’s as far as me, or behind me?
A: You cannot enter the other raid.
Q: Is my progress saved?
A: Yes, your progress is saved until the end of the week when the maintenance happens.
Q: Is it locked by account or character?
A: it is locked to your character.
Q: The bidding system seems dangerous, you have to trust someone with thousands of gold potentially. Is there another way?
A: No, you have to pick a trustworthy person. If they attempt to scam, get their name out on your server, blacklist them, and report them to NCSoft.
Q: I have heard people talk about Black Tower, what’s that?
A: Skybreak Spire is Black Tower, that is the literal translation from other regions.
Q: Can I pug this?
A: Maybe.
Q: Is there a non rng way to get the accessories and weapon upgrade material?
A: No.
Q: Are you sure?
A: Yes.
Q: There should be.
A: complain to NCWest. It’s worked before.
Praetor19, Consuume, Soseono, Exteinz for assistance in creating the guide
LB (twitch: whycantigetausernameiwant) for translations
쿠엔크 for providing information about some mechanics
Volmie and Yevvie for providing illustrations
Shadovv for guide corrections
This spire was once said to be the pinnacle of the Naryu, now taken over by a lieutenant of the Dark Lord the Raven King. Form an alliance and storm into the fortress, and reclaim the Naryu lands from a colossal venomous ploggle, the demonic horde, continent-conquering automatons, and your old former clan mate. Within the spire are vast riches to behold, but the dark forces won’t let you take them easily.
Table of Contents
Introduction
Boss 1: Venomsky Drake
Boss 2: Nightfall Generals
Preboss Gauntlet: Corridors
Boss 3: General Moyun and Shuna
Boss 4: The Raven King
Looting
Rewards by Boss
Gear
FAQ:
Introduction:
Skybreak Spire is the first true 12-man raid with four powerful bosses, rewarding Legendary Soul Shields, Legendary Elemental Accessories, and an upgrade to your Baleful or Seraph legendary weapon that turns it into the Raven weapon.
Skybreak Spire has a weekly lockout until the weekly quest reset (can be viewed in the minimap clock icon; resets on Wednesdays at 12:00PM UTC in North America and 6:00AM UTC in Europe); the weekly limit can be reset in your character menu with 10 Khanda Vihar Resets, from the Hongmoon Store or events, and 30 gold in your inventory.
The dungeon is divided into four phases for its four bosses, and you may only clear each phase once before reset. The lockout occurs on clearing the first boss, and you are given a dungeon number that only allows you to run with members of the same alliance. If you enter with someone who has already completed the first, second, or third bosses without having done it yourself, the game will mark you as having already completed those bosses, and will prevent you from killing them until reset.
Except for the Venomsky Drake, none of the enemies in this dungeon can be grabbed.
Except for the Raven King’s Punishment attack, none of the enemies have visible attack indicators.
Requirements:
Must have completed Chapter 5 of the Khanda Vihar storyline.
Recommended Gear:
At least 25,000 DPS is needed to clear the dungeon. The last boss requires a few people with 38,000.
2000+ accuracy to prevent missing, Stage 6+ Baleful/Seraph weapon, Stage 6+ Hongmoon Soul, 8-piece Midnight Skypetal Plains Soul Shield or 5-piece MSP + 3-piece Xanos, Oath Necklace, Awakened Xanos Earring. You will also need enough healing to survive, as each boss will deal unavoidable damage to you.
This is all recommended gear, you can do it with less gear with skill and ping.
Recommended Raid Composition:
2 Warlocks, one for each party
3 tanks (one being a Blade Master or Kung Fu Master, another being a Force Master, Summoner, Warlock, or Gunslinger)
2 Fighting Spirits, one for each party (Assassin or Kung Fu Master)
2+ party iframes one for each party (Assassin/Summoner, Force Master/Destroyer, Blade Master/Blade dancer)
2+ healers one for each party (Summoner or Soul Fighter)
Voice chat is highly recommended, if not necessary for the raid.
Make sure looting rule is set to Master Looter
Make sure Warlocks and Summoners do not Gravity Well and Crouching Tiger taunt.
Boss 1: Venomsky Drake
HP: 126,400,000
Enrage: 10:10
CC Bars: 6x
This boss is similar Meganura of the Dawn of Khanda Vihar raid, but with some key differences. Like Meganura, this boss passively takes 50% less damage from all attacks.
Roles:
Tank: Blade Master or Kung Fu Master
Buff Transporter: Force Master or Warlock are optimal, anyone with a ranged attack can do it. This person should be marked so people can see exactly where they are.
Basic Attack Rotation:
- 2x Head swipes
- Headslam/Tongue Strike (unblockable)/Jump
- Tailslam/3x Tail Swipe (CCable)
When Venomsky Drake does his 3x tail swipe, he should be CC’d (knockdown) to prevent him from dealing massive damage to the party. You can use Summoner’s Power Pounce, but avoid using Destroyer’s Grab/Blade Dancer’s Phantom Grip as moving the boss is detrimental.
Mites and Poison Removal:
After engaging the boss, a small mite will spawn at the 7:00 position and a large mite will spawn at the 1:00 position. The tank should be tanking at the 7:00 position, and the rest of the party should be at the 1:00 position, at the boss’s back left leg.
The small mite is reserved for the tank, no one else should hit it. It will give the tank a 200% AP buff, and poison immunity for 30 seconds. The tank should either use a ranged skill to hit it (Blade Master) or dash to it and back to the boss quickly during an attack with a long animation.
Blade Masters that are dpsing should not use Hongmoon Soaring Falcon Move 2, as it can hit the small egg if the boss is too close to it.
The only person hitting the large mite should be the Buff Transporter. When they hit the mite, they will get a 5 second buff and an indicator they can see. When that buff expires, a 5m red AoE will appear around them where the indicator was.
Everyone that was in the indicator’s radius when the AoE spawned will have poison removed, and get either a 15 second red buff, or a blue buff (determined randomly) that gives them temporary immunity to poison. If they have no poison stacks, including from having the buff, they will instantly die.
After 15 seconds, red buffs will turn into blue buffs, blue buffs will turn into one poison stack, and poison will start stacking again. Similarly, the red circle will turn into a blue circle, and then the blue circle will vanish.
If you stand in the circle that your buff matches, you will get +100% (double) AP. If you stand in a circle that your buff does not match, you will get -50% (half) AP. If you stand in a circle with no buffs, nothing will change.
Buff Transporter Timings:
The buff transporter should time the poison immunity circles as seamlessly as possible in order to minimize the amount of poison people have to tank.
If the buff transporter gets the red buff, they should hit the mite when there is 5 seconds left on their blue buff.
If the buff transporter gets the blue buff, they should hit the mite when they reach 5 poison stacks (1 poison stacks every 2 seconds).
You can also remove poison stacks on yourself with a Khanda Vihar Antidote, but be careful, if you have 0 poison stacks when the buff is applied, you will instantly die. It’s generally a good idea to use an antidote when you reach around 7-8 stacks.
Add CCs 90/60/30%:
When Venomsky Drake hits the HP thresholds, it will roar, become invulnerable and jump to the center while summoning adds at 12/3/6/9 o’clock positions around the arena. These adds must be 2x CC’d immediately, or there will be a wipe.
Flowers 80%/50%:
At 80% and 50% HP thresholds, the boss will roar and jump to either 12:00, 8:00 or 4:00 positions.
He will spit 3 poison aoes at the tank before creating flowers and then spitting 4 more. The tank should move in an arc from 6:00 to 9:00 and try to hit the mite during the flower spawning. However, the poison AoE only does damage on landing, but the poison immunity buff will prevent any further damage, so the tank can alternatively keep engaging the boss while lifestealing through the damage.
After three poison AoEs, it will stick its head in the ground and summon flowers that heal him, throw 4 more poison aoes to the tank, roar again and go back to its normal phase.
These flowers will heal the boss if you do not remove them. If someone with a red buff steps in a flower, it will start damaging the boss instead of healing it, but their red buff will be removed and they will start taking poison damage. Otherwise you will get rooted.
As red buffs are the only thing that can remove the flowers, the buff transporter should stall the buff when the boss starts this phase. It takes about 20 seconds from when the boss roars to when the flowers start to spawn, so keep that in mind when timing buffs.
Flowers 20%:
Unlike 80%/50%, at 20% HP the boss will not roar and jump, but will start spawning flowers constantly. The buff transport interval should be shortened to 15 seconds instead of 30 seconds, as people with the red buff should be turning flowers red. The buff should also be delayed until just before 20%, so that the flowers are turned red as soon as possible.
WARNING:
If your team has extremely high dps, you may push it to an add phase (60% or 30%) before he starts the flower phase (80/40%). If this happens, he will become invulnerable and float, but the adds will not spawn. If this is a concern, hold off on DPS until flowers spawn.
Boss 2: Nightfall Generals
Za Misung/Nok Jasung/Hwang Gusung HP: 12,400,000
Bak Taisun’s Phantom HP: 32,000,000
Enrage: 6:00
CC Bars: 4x
This boss is unique as it begins using the Soul Separation ability seen in the Khanda Vihar storyline, and consists of 5 bosses: the main boss, Bak Taisun; three bosses in the real world, Za Misung, Nok Jasung, and Hwang Gusung; and one boss in Soul Separation space, Bak Taisun’s Phantom.
Roles:
3 tanks one for each real boss (doesn’t have to be Blade Master or Kung Fu Master, someone with high DPS works as they will be the only one hitting the same boss)
9 Soul Separation: These people will be travelling in and out of Soul Separation throughout the fight, put six in one party, and the rest in the other party in each other party.
Basic Attack Patterns: All of the real bosses have the same attack pattern, using attacks from Taikhan.
Water Cannon/Curl+spin -> 2x swipe -> 2x swipe + slam
If the tank gets too far from their boss, it will throw projectiles at the top 4 people on its aggro table.
The phantom has a different attack pattern, incorporating Taikhan’s grab and throw.
This boss is a little odd, as you don’t fight Bak Taisun directly until the very end. When you engage Bak Taisun, it will hide itself and spawn four bosses: the three colored sub bosses in the real world, and an illusion of itself in Soul Separation.
The three real world bosses will each go to their colored circle in one of the zones. The yellow one will go southwest, the green one will go north, the purple one will go southeast, and the illusion will remain in the center in Soul Separation. The core mechanic of this boss is entering and exiting Soul Separation.
Entering Soul Separation:
After they jump to their circles initially, each real boss will select two people to enter Soul Separation, for a total of 6 at the start.
If they are not attacked by anyone other than the tank, they will send people within 8-16 meters from them into Soul Separation. These players should avoid standing in the middle, directly where Bak Taisun was, or they won’t get sent in.
If they are attacked by non-tank players, or have hit them with their initial jump, they will send those people instead.
After jumping to the circle, the boss will do an animation as if they are looking around them, and mark people for Soul Separation. Once they do that animation, everyone can hit them.
Each boss will stack the Annihilation debuff of their color on everyone near them every 2 seconds. Each stack of the debuffs reduces HP recovery by 1%, increases your piercing by 1%, and will deal 5,600 damage every time it stacks. The debuffs only last for 80 seconds before wearing off, but if you reach 30 stacks of a single color you will die.
Some time after they jump to their circles (when people reach 10 stacks on the first set, 20 stacks on every one after that), the boss will stop their current attack and go into a healing animation and heal 1% if it completes. They will keep doing this until they are knocked down. Each one must be knocked down with 2x cc make sure to not launch or use Blade Master’s Soaring Falcon Move 2 or Assassin’s Webbing. They will do a getup attack, then jump clockwise.
When the next color arrives, the only one hitting it should be the marker for soul separation. It will phantom grip its tank, removing their Annihilation stacks, before attempting to smash them for very high damage and should be interrupted by 2x stun. Once the stun wears off, it will either choose the highest DPS person on it, or the closest person to mark for soul separation with the gaze animation (excluding the tank), if the only person who hit is was the marker and they are standing close enough, it should guarantee they get marked. Once it marks, everyone else may start hitting it as the marker moves into Soul Separation.
Soul Separation Mechanics:
When you’re in Soul Separation, you can see actions in the real world, but neither real or soul separation spaces can interact with one another. In the center will be Bak Taisun’s Phantom which you must kill. However, entering soul separation gives you a 90 second debuff, once that expires you will die.
After about every 3 attacks, the Phantom will do a gaze, and mark the three closest people to him. These should be the 3 people who have been in Soul Separation the longest. After marking the three closest with a white ball over his head, he will attempt to heal himself by 1% and resume attacking. Knock him down and each of the marked people should move to their circle (determined ahead of time). The Phantom will jump on each of them, putting them in the real world, and everyone near them will gain a healing buff that overpowers the healing reduction from the debuffs.
The Phantom doesn't always need to be knocked down when he tries to heal, it should be done shortly after the outside bosses are knocked down and the 3 new people enter soul separation. If you don't need to knock him down, just stun him to prevent the heal and he won't jump.
After the jumps, he will jump back to the center and mark the three closest people and attempt to heal himself again. Stun this one, and he will continue his normal rotation.
Once the Phantom dies, everyone will be forced out of Soul Separation, and knocking down the outside bosses will no longer put people into Soul Separation.
Bak Taisun:
HP: 12,600,000
Enrage: 1:00
CC: 4x
While the Phantom can be killed before the other three bosses, the real world bosses cannot die until all of them are reduced to 1 HP and the Phantom is dead. Once every subboss is killed, the real boss will reappear in the center of the room.
The timer doesn’t start until the boss is aggroed, so revive everyone who’s dead and heal up before engaging (if someone is dead in the center they need to stay dead; if there is an Assassin or Soul Fighter put them in the same party as them and have them use Lotus of Escape/Slipping Lotus to pull them out from the center). This boss has no mechanics to it, just the basic attack rotation. Burst him down in 1 minute. If you fail this or reset him, you will have to start from the beginning with the 4 subbosses.
High DPS Strategy:
Requires 60,000 DPS from 6 people
If your party’s DPS is high enough to kill the Phantom before their soul separation debuff expires 90, you can ignore the exiting/entering of soul separation and just burst all four subbosses down. The inside boss should be stunned only to prevent him from healing.
Meanwhile nobody in the real world should be using knockdowns on their bosses; once they start trying to heal they won’t be doing anything else. Once your Annihilation stacks reach dangerously close to 30, simply rotate to another boss.
In order for this strategy to work, you don’t just need high damage but also good hp recovery, as there will be no healing buff provided, and the debuffs will still stack, reducing your recovery and dealing damage.
If knockdowns are used in this strategy, nobody will be available in the real world to save the tanks when they get grabbed.
Preboss Gauntlet: Corridors
Between bosses 2 and 3 there is a switch followed by a room with 2 adds and 2 long corridors. If you have a key from completing the corridors, you can skip the corridors by using one on the switch. If you fail to defeat boss 3 and everyone leaves the dungeon, you will have to clear corridors again.
In the fork of the road are a pair of Chuanka-like adds. If the aggro holder is at a distance they will throw projectiles which can be blocked with ranged protection.
Once they are dead, Lusung will appear. He has 12,800,00 HP and uses Kung Fu Master and Force Master attacks. At 50% he will send half the party into soul separation. After some time he will charge up an attack, people in the real world need to cc him (only real world can apply CCs) which will take everyone out of soul separation. If you kill him before he does his ccable attack, then everyone in soul separation will die after 30 seconds, just resurrect.
After he is defeated, split the raid in half to fight the adds. Each room is guarded by a Devourer-like add, and each room contains Ebondrake Humanoids, Elite Bonemask-like, and Mane-like adds. Each of the large mobs will apply the Tainted Poison debuff dealing 4,500 damage per second and stacks, so lure them to the entrance so you only have to fight one big mob at a time.
All of the mobs are perma-rootable which you can abuse using Force Master’s Frost Palm and Soul Fighter’s Snowball Chill, Force Master’s Force Blast, Summoner’s Grasping Roots, and Warlock’s Soul Shackle.
In the third room once all the normal mobs are dead, a miniboss will spawn at the end of the room with 17,300,000 HP. Once you engage it, a wall of purple fire will appear on the opposite side of the room and start moving across the room. This fire will kill anyone who it touches.
Every 20% HP, the boss will send everyone into or out of soul separation, which will remove the fire wall, he will teleport to the opposite side of the room, and a fire wall will spawn where he was. The tank should move on either the left or right wall, as the boss will throw ranged attacks at the tank that leave large damaging AoEs on the ground.
If you do too much DPS to skip a phase the boss will teleport in-place.
After throwing the AoEs it will charge up a vacuum before knocking everyone back, 8x CC this.
The boss cannot die until the other side’s boss is at 1 HP, but once it hits 1 HP the purple fire will disappear and it will just keep attacking, there is no enrage.
The fifth and final room on each side contains no mobs, but the last miniboss, which behaves similarly to Iruga from Sogun’s Lament. It has 29,500,000 HP and a 3 minute enrage timer.
Ranged classes should be tanking this boss, as it will just throw projectiles if the target is far away, and they can rotate between ranged protection skills. If a melee tries to tank this boss will constantly do knockdown attacks under it.
At 50% HP, the miniboss will send the 3 farthest people on its aggro table to soul separation and spawn a colored add at 3:00 and 9:00 positions. 2x stunning the blue, dazing the red, and knock downing the green will remove them instantly, similar to Iruga adds. People in soul separation cannot CC the adds, so the CCers should make sure to not be the farthest people at those thresholds, or just not hit the boss at all.
Once all the adds are CC’d, people in soul separation are taken out of it. If the adds aren’t CC’d within 30 seconds, everyone in soul separation will die.
Once both minibosses are brought to 1 HP they will die and the door to the third boss will open. Each one drops keys that let you skip the corridors, but only follows normal looting rules by the party that picked it up.
Boss 3: General Moyun and Shuna
General Moyun (Spear General) HP: 94,800,000
General Shura (Shield General) HP: 115,600,000
Enrage: 10:40
CC Bars: 6x
Roles:
1 Melee Tank (Blade Master or Kung Fu Master)
1 Ranged Tank (Force Master, Summoner, Warlock, or Gunslinger)
Aerials: These people should be responsible for knocking the bosses up over the correct lasers. This is commonly the tank's job, both melee and range, but it can be anyone. Assassins are unreliable for this, as they can unintentionally use Webbing on the launched boss which will cause it to instantly drop on the ground.
This area is comprised of two bosses on opposite sides of the room in their own squares, and an instant death zone between them.
Basic Attack Rotations:
Shield General:
This boss requires a melee tank, who should face the general towards the wall. if the tank moves 4 or more meters from the boss, it will gain the Bulwark buff for 5 seconds, making it invulnerable and healing 1% of its health every second. Melee must engage this boss before the ranged tank to prevent Bulwark from occurring. All of the attacks can be blocked or countered.
- Line of Ice: Slams his shield into the ground creating a frontal AoE of ice in front of him, can be sidestepped.
- Shield Swipe: Swipes his shield in a frontal AoE, can be sidestepped.
- Triple Swipe + Shield Slam: Swipes his shield three times before slamming it into the ground, damaging and stunning everyone near him. The three swipes can be sidestepped.
- Shield Slam + Raise: Slams his shield in the ground, damaging and applying Freeze to everyone around him. After a few seconds, he will pull it out, damaging everyone around him and knocking them down.
This boss requires a ranged tank, who should stand at the edge of the square on the inner side. If the tank stands 10 meters or fewer from the boss, he will create an AoE around him for several seconds that deals massive damage to everyone within 10 meters.
- Line of fire: Shoots a line of fire at the tank and stacks Ember, can be sidestepped.
- Triple Fireball: Shoots 3 fireballs at the tank, stacks Ember. Can be blocked or resisted with projectile resist skills.
- Counter Spin: Engages a counter stance that, if hit on the front, he spins his spear around him, damaging everyone on his block and deals increased damage with Ember stacks. Does not prompt guard breaks. If Spear General is inflicted by a defense disable debuff (e.g. Summoner’s Flying Nettles/Briar Patch, Assassin’s Venom Swarm), he will skip over this attack.
Blue/Red Lasers:
This is the exact same mechanic as Rocnar from Naryu Foundry.
Spear General will start this mechanic before Shield General.
Periodically, the boss will scan 1-8 meters in front of them several times. Anyone hit by the scan will have their aggro reset and gain the Detect debuff that removes 50% focus per second for 10 seconds.. During this the bosses are CCable. A blue laser and a red laser will travel from either the north or the south, and in a random order. Each boss must be 6x stunned and aerialed over either the red or blue laser, and touch the other laser. The lasers will do damage and stun players that touch them, but they can be iframed or jumped over. Avoiding the same colored laser is FAR more important than getting them to touch the opposite colored laser, so make sure you do that.
Assign one person on each side to be the one doing the aerial, this can be the tanks (range tanks can move into melee distance during this). Melees should make sure to not extend the the aerial too long, and not end it too early.
Spear General:
- Red Laser will give it a 10 minute Recharge buff, 3 stacks of this causes enrage.
- Blue Laser will damage it by 5% of its max HP.
Shield General:
- Red Laser will apply a 60 second stackable Overheat debuff that does approximately 100,000 damage over time per 2 seconds.
- Blue Laser will give it a 60 stackable massive defense buff.
Boss 4: The Raven King
HP: 215,300,000
Enrage: 14:10
CC Bars: 6x
Roles:
Tank: Blade Master or Kung Fu Master, must be on top of their game.
Soul Separation: 3+ people who will do Soul Separation, 3 for the first phase, then individuals for last phase. After the first phase the first group cannot get into soul separation again for the next 5 minutes, so the next group may need to be different.
Basic Attack Pattern:
- Triple Swipe: Swipes in front of him in a cone thrice, the last hit knocks back and down.
- Punishment: The Raven King will create two rings around him sequentially, either hitting 0-10 meters or 10-25 meters, in a random order. You must physically avoid this attack; getting hit or iframing will apply the Punishment debuff, dealing 5,800 damage over time every 2 seconds and lasts 60 seconds. Melees should stand 3 meters from the boss and prepare to SS + Gapclose while ranged stands 10 meters and adjusts to the AoE.
- Quadruple Swipe: Swipes horizontally four times, the last hit knocks back and induces unconscious.

If the tank stands over 10 meters from the boss, he will jump at them and then cast Punishment. If they are still too far, the boss will do a gesture and the tank will instantly die.
Special Attack Rotation:
During his normal rotation, the Raven King will start this after the first Punishment, then every 2 full rotations after.
- Mark: The Raven King will lift his hand in the air and mark the three closest people. After a couple seconds, everyone with the mark will have a damaging AoE created around them. Move away from the group if you get the mark.
- Jump: Jumps toward the farthest person. The landing is unblockable and causes knockback and knockdown.
- Fire Breath: Breathes a line of fire at the tank.
His map is very important to keep track of, as understanding its layout helps with mechanics.
Special Attack Phase 80%/30%:
When The Raven King hits these HP thresholds, he will finish his current attack, jump to the center, and fly up into the air becoming untargetable. He will summon three Devourer-like Dark Ghost adds with 6,00,000 HP and 4x CC each at the 12:00, 4:00 and 8:00 positions.
You have 50 seconds to kill these before the raid is wiped. These adds are able to be permanently rooted from Force Master’s Frost Palm and Soul Fighter’s Snowball Chill, Force Master’s Force Blast, Summoner’s Grasping Roots, and Warlock’s Soul Shackle, and should be if possible. If their aggro holders get too far from them they will do an AoE suction on everyone nearby, but if the perma-root is successful they shouldn’t do many attacks.
While you are killing the adds, periodically 2 people closest to the add will be marked with the raven marking, make sure to move away from the group if you have the mark. The Raven King will also constantly throw AoE projectiles at random people that do very high damage, use ranged protection skills to defend yourselves from these.
Once the adds are all dead, the Raven King will come back down in the center, send the 3 farthest people to Soul Separation, and begin his clock rotation. Root the boss to give people enough time to get into position.
Real World:
Everyone should group up in the wedge at 7:00 aside from the 3 markers for soul separation. The Raven King will turn all but that wedge of the arena black, and anyone other than the tank in that black zone will instantly die. He will constantly recreate this kill zone and will move one wedge clockwise based on the tank’s position. If the tank moves counterclockwise as shown in the gif below, the safe zone will remain constant making the party significantly safer. Put a marker on the tank to make them stand out.
Attack Pattern:
The Raven King has an attack pattern during this phase, when he is facing the party due to tank moving to that wedge, people should be wary of his attacks.
Triple Strike -> Quadruple Strike -> Fire Breath/Spin -> Triple Strike -> Quadruple Strike -> Fire Breath/Spin -> Suction
- Spin: This is a new attack that the Raven King does during his special attack phase. He will spin for a couple second, parrying attacks and stunning anyone who attacks him during it for 3 seconds, before knocking away everyone near him. The parry goes through parry penetration skills, including from Second Wind. Make sure to not attack into this.
- Fire Breath: Party iframes should be used during this attack if the Raven King is facing the party.
- Suction: He will do this after every 2 rotations. The Raven King will prepare for a second before sucking everyone into melee distance and dazing them. He is 6x CCable during this, make sure to CC him to prevent this attack.
- Marking: Periodically the Raven King will mark 1 random person with the raven marking. As soon as you get the mark, move back so the AoE doesn’t get in the way.
If the tank stands 10 or more meters from the boss during this phase, the boss will do a gesture and the tank will instantly die.
During the 80% phase, this phase lasts for two full clock rotations or four attack pattern rotations, after which the Raven King will jump to the farthest person and fire breath the tank before returning to his normal pattern.
Soul Separation:
When the Raven King lands, he will send the 3 farthest people to Soul Separation. One person should be in each of the 12:00, 4:00 and 8:00 wedges, at the edge of the arena, they will be sent to Soul Separation before the kill zone is created.
In Soul Separation, there will be 3 Lusung’s Phantoms with 1,710,000 HP each, where the Dark Ghosts were. They will not attack the players, instead they will be stacking the Demonic Energy buff on the Raven King.
If the buff reaches 100 stacks, the raid will wipe. If you do not have the DPS to kill the Phantoms before 100 stacks are reached, instead coordinate ccs/aerials/grapples so all 3 of the spirits are CC’d simultaneously. The buff only has a duration of 3 seconds, so if all the CCs are coordinated, the buff will reset back to 0.
Once all of the Phantoms are dead, the soul separated people should move back to the safe zone and look for the AoEs dropped by the people with the raven mark. Stepping in the AoE will send you back to the real world. If the soul separation buff just naturally expires after 90 seconds, the soul separated people will die.
Exiting Soul separation will apply a 5 minute Aftereffect debuff that kills you if you try to enter soul separation again, so the people for each phase need to be different.
30% Phase:
This is the hardest phase of the boss, and the cause of the majority of failures on this boss. For this phase, you must have a set one by one order of people to enter soul separation. The first couple people should be your highest DPSers.
Before this phase starts, keep him at 32% for a period of time. Have one or more people assigned to keeping bleed active, but only the tank should be hitting the boss otherwise until all buffs are off cooldown. Once everyone is ready, wait for him to do his jump attack before going in and doing as much damage as possible without using Fighting Spirit and Soulburn before he starts his phase.
Real World:
As far as the real world mechanics go, it’s much the same, however with some key differences. Unlike the other phases, this phase will continue until the boss is dead, or the party is dead. Whenever the boss performs his suction attack, he will immobilize the tank and disable all their abilities for 10 seconds. Every time this happens, the safe zone will move clockwise, and the party must move with it. The Raven King is CC’able while casting the root which doesn’t do anything, so be prepared to alternate stun and knockdown in case.
The kill zone will disappear after two full clock rotations/four attack pattern rotations, but the mechanics will keep going, so keep everything the same.
Soul Separation:
This is where the true difficulty of this phase starts. After the Dark Ghosts adds are dead, instead of sending the farthest 3 people into Soul Separation, he will instead send only the one farthest in at a time every 15 seconds. There will be three Lusung’s Phantoms alive at the start at the 12:00, 4:00 and 8:00 positions as normal, but 3 more will spawn every 60 seconds at the 2:00, 6:00, and 10:00. If 6 are alive simultaneously, the raid will wipe.
The first person should enter soul separation at the 12:00 position. Buffs should be used immediately before they enter soul separation, they will not receive them if they are in soul separation when the buffs are used. This person needs to kill the spirit at 12:00 as quickly as possible, If they cannot kill in under 45 seconds it will likely be a wipe (approximately 38,000 DPS).
The second person will enter Soul Separation after 15 seconds, and they should immediately go to kill the spirit at 4:00, buffs should be used before this person enters soul separation too. Once the 12:00 spirit is dead, the first person should move to help with the spirit at 4:00 too, and once that one is dead, help with the spirits as they keep spawning until they need to exit.
The third person should move to the 8:00 spirit when they enter soul separation and be prepared to CC it.
For every soul separation after the third, people should be moving in a clockwise pattern when they enter, and either wait for new adds to spawn or help kill adds that are currently alive. The exception is the 5th person, who will have to move to the 6:00 spirit. Some people will have to enter soul separation as the safe zone is moving, so they should be very careful.
This is someone difficult to understand, here is a table to help understand where each person should go. If there is a slash, go to whichever add needs help more.
1: 12:00 -> 2:00 (4:00 if time)
2: 2:00 -> 4:00
3: 8:00 -> 6:00/10:00
4: 10:00 -> 8:00/12:00
5: 6:00 -> 4:00/8:00
6: Kill boss
Make sure to coordinate CCs during this phase too, as the boss will still enrage if he reaches 100 stacks.
As the soul separation buff is 90 seconds long, each person should start moving back to the safe zone to exit soul separation at about 10-15 seconds left. Once they exit soul separation, they will get a debuff preventing them from re-entering soul separation. As such, everyone must know what to do here, in case this phase takes a long time and they enter soul separation.
Looting
Loot Distribution Method:
The method loot is distributed is the Master Loot system, as you cannot bid on the loot through the entire raid. When the boss is killed, the raid leader can go to pick up the loot, and this interface will appear.
Warning, if you do not set to master looter, only the party of the person who picks up the loot can bid.
You may link the items in chat, and choose who to give each item to by clicking on the item, clicking on their name, and then the button underneath the names on the right side to give the selected person the selected loot. You can also filter by class to make searching easier.
Bids are done in chat similar to a real-life auction. The leader links all the items at the start, then one at a time to start each bid. Usually there is a minimum bid set so people will get gold from bids, and a bid interval set so de facto copper wars don’t occur. This is all up to the individual raid. Once someone wins the bid, they give the assigned treasurer the bid gold (can be the leader or another designated person), and the leader gives them the item.
The treasurer usually distributes the gold at the end of the raid, but some choose to distribute after each boss, although this lengthens a raid greatly.
As long as the interface is open, the loot won't disappear. If the interface is ever closed, then the loot will disappear if it's been 5 minutes since the boss was killed.
Rewards by Boss
The equipment that you can get from Skybreak Spire is legendary elemental earring and ring, class specific legendary soulshields, and the material to upgrade to the legendary Raven weapon. The bonuses the legendary soul shield provides can be found on Praetor19’s cheatsheet here. The dynamics and weeklies give raven feathers, and the final boss’s dynamic box gives Raven King’s Soul as well as a chance for Sealed Raven King’s Soul. The feathers are used to upgrade the accessories, and purchase soulshields/cosmetics. The Raven King’s Soul is used to upgrade Raven Weapon, or can be transmuted to three Raven Feathers.
Venomsky Drake:
- 1x Accessory:
- Igneous Earring (Flame)
- Supernova Earring (Lightning)
- Penumbra Ring (Shadow)
- Dragonstorm Ring (Wind)
- Igneous Earring (Flame)
- 2-4x Pieces 1 and 2 Soul Shields
Nightfall Imperators:
- 1x Accessory
- Phantasm Earring (Shadow)
- Seismic Earring (Earth)
- Ignitor Ring (Flame)
- Frostfall Ring (Frost)
- Phantasm Earring (Shadow)
- 2-4x Pieces 3 and 4 Soul Shields
- 1x Face Adornment
- Jade
- Violet
- Golden
- Silver
- Jade
General Moyun & Shuna
- 1x Accessory:
- Permafrost Earring (Frost)
- Dragonsong Earring (Wind)
- Lodestar Ring (Lightning)
- Tremor Ring (Earth)
- Permafrost Earring (Frost)
- 2-4x Pieces 5 and 6 Soul Shields
- Chance for 1x Raven King’s Animus, Ferocity, or Energy
- Raven King’s Souls
- Gold Standard Outfit
The Raven King
- 2-4x Pieces 7 and 8 Soul Shields
- 1x Raven King’s Animus, Ferocity, or Energy
- 1x Cosmetic:
- Outfit:
- Dark Path
- Ravenfall
- Dark Path
- Adornment:
- Broken Wing (Dark Path Adornment)
- Broken Wing (Dark Path Adornment)
- Head Adornment:
- Nightmare Hair
- Nightmare Hair
- Face Adornment:
- Ravenfall Mask
- Ravenfall Mask
- Outfit:
- Sealed Raven King’s Soul
Shop:
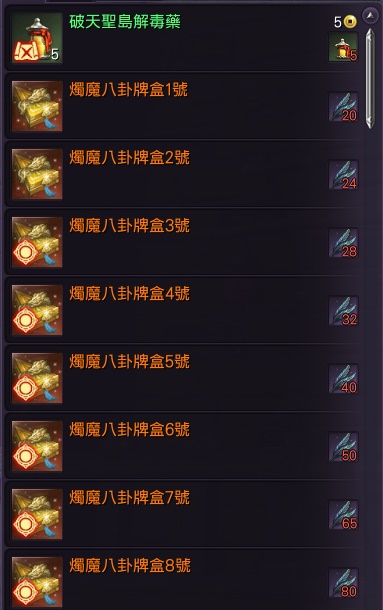
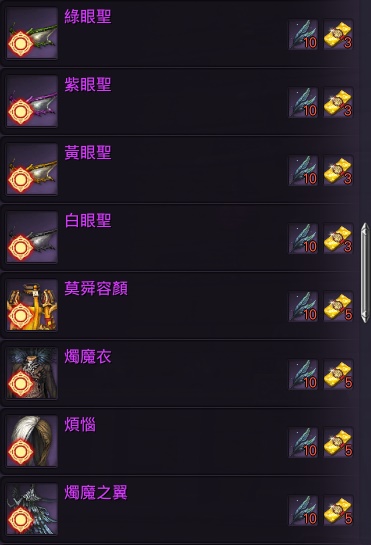
In order to buy Soul Shields and cosmetics, you need certain achievements. Soul Shields 1-4 require nothing, 5-6 require first boss (Venomsky Drake), and 7-8 require second boss (Nightfall Imperators). The cosmetics require the 10 kill achievement for the boss that drops them, Raven Masks from second boss, Gold Standard from third boss (Generals Moyun & Shuna), and rest from final boss (Raven King).
The legendary primers can infuse up to 401 in their respective stat, and require 5 Masterwork Shield Bases from Soul Warden and 5 Raven Feathers.
Gear
There are four distinct rewards from Skybreak Spire gearwise, legendary elemental earring, legendary elemental ring, legendary soulshield, and the legendary Raven weapon upgrade material.
You will also get Raven Feathers from the weekly quests and from the dynamic box that each boss gives. These feathers can be used to upgrade accessories, purchase soulshields, purchase cosmetics, and purchase the Skyrift/Pulse Badges from Celestial Basin
The final boss drops Raven King’s Soul from its dynamic box and for bidding, which is the material used to upgrade the Raven weapon between stages. They can also be transmuted into three Raven Feathers each. If you don’t think you’ll get the weapon material any time soon, or won’t be able to afford to upgrade it, or if your weapon is maxed out, then transmuting the souls to feathers for other uses is a viable plan. If you want to level your weapon quickly though, save them.
Upgrade Priority:
The earring and soulshields are your most important upgrades if your weapon is not max, if your Baleful or Seraph weapon is max and you have the materials to upgrade it to stage 1 Raven weapon, then the weapon material takes priority.
The earring and ring share a limited upgrade material (Raven Feathers), so you will have to choose which to upgrade if you have both. In all cases, use feathers on the earring instead of the ring. A maxed out earring is significantly more useful than breakthroughs on ring.
Legendary Elemental Earring:
There is an earring for each element, the one shown above is the shadow earring. The only difference between them is the element and which boss they drop from.
The Earring has a high chance to proc “Critical Bonus” buff, increasing Critical Rate by 5% and all critical hits deal 100% Attack Power Bonus. After Stage 4, the buff increases Critical Rate by 10% and all critical hits deal 100% Attack Power Bonus. The buff lasts for 5 seconds and procs extremely often, enough to consider a 100% uptime.
At stage 10 it gains the ability to debuff the enemy with Punishment. This lasts 10 seconds and anyone hitting the target gains “Critical Bonus” which provides 5% Critical Rate and all critical hits deal 100% Attack Power Bonus for 3 seconds. Despite sharing the same name as the Earring proc, these are two separate buffs which can stack their effects.
Legendary Elemental Ring
There is a ring for each element, the one shown above is the shadow ring. The only difference between them is the element and which boss they drop from.
The Ring has a low chance to restore 10% focus on critical hit. After Stage 4, the proc restores 20% focus on critical hit. Due to the critical hit condition, as well as the rather low proc rate, the ring is of less importance than the earring.
At Stage 10, it gains the ability to proc the Chaos debuff on the enemy. It lasts 5 seconds and gives 10% focus back to party members who hit the target.
Legendary Raven Weapon Material
The material to upgrade a stage 10+ Baleful/Seraph weapon to Raven drops from the third and fourth boss, chance for one on the third and guaranteed for one on the fourth. There are three different materials shown above, which material drops is completely random.
The Animus is used for Blade Master, Blade Dancer, and Soul Fighter only.
The Ferocity is used for Kung Fu Master, Destroyer, Assassin, and Gunslinger only.
The Energy is used for Force Master, Summoner, and Warlock only.
The material is useless for the classes that can’t use it, but it is account bound meaning that it can be mailed to another character within the account.
This material is only used for upgrading from Baleful/Seraph or Dawnforged/Riftwalk to Raven weapons, to upgrade between Raven stages instead uses Raven King Souls.
Legendary Soul Shields:
Each boss drops 2-4 soulshields, which ones they drop are shown above. Each soul shield can be for any class, it is completely random; you could have all 4 for one class, or each could be for a different class. These soulshields, like the Midnight Skypetal Plains, give unique modifiers to each class. These modifiers and their stats can be found on Praetor19's cheatsheet.
These soul shields also have a higher maximum infuse limit than the standard legendary primer.
FAQ:
Q: Can I run Skybreak Spire as much as I want?
A: No, there is a weekly lockout.
Q: How does the weekly lockout work?
A: Every raid is assigned a number. Once you kill the first boss, or enter an instance where the first boss is killed, you are locked to that number raid. You cannot enter any other raids on that character until the weekly maintenance.
Q: What if I want to join another raid that’s as far as me, or behind me?
A: You cannot enter the other raid.
Q: Is my progress saved?
A: Yes, your progress is saved until the end of the week when the maintenance happens.
Q: Is it locked by account or character?
A: it is locked to your character.
Q: The bidding system seems dangerous, you have to trust someone with thousands of gold potentially. Is there another way?
A: No, you have to pick a trustworthy person. If they attempt to scam, get their name out on your server, blacklist them, and report them to NCSoft.
Q: I have heard people talk about Black Tower, what’s that?
A: Skybreak Spire is Black Tower, that is the literal translation from other regions.
Q: Can I pug this?
A: Maybe.
Q: Is there a non rng way to get the accessories and weapon upgrade material?
A: No.
Q: Are you sure?
A: Yes.
Q: There should be.
A: complain to NCWest. It’s worked before.