
Author: Dreamslayer
Fair credit attribution: This is an expanded, written version of the video guide made by LucidDream, aka Licod Games.
I’ve extracted highlights from the video, but also added additional information, clarifying notes, and attack descriptions for notable attacks.
Litewarior gave the rotations for the first three bosses.
Original video can be found at the following link:
Disclaimer: Since I’m basing this on JP HP values, the actual values may be different in NA. The names are also taken from JP, and may be incorrect. I will update the names later once everything is out. -Dreamslayer
Outlaw Island
Outlaw Island is a solo dungeon consisting of five consecutive boss fights. The fights vary greatly in mechanical difficulty, but are all easily possible with around 700 AP.
Boss 1: Awakened Bomani
HP: 3,470,000
Enrage: 3 Minutes
Phases: 70% and 40%
Bomani is an Ice-type Soul Fighter who specializes in long range combat. You will need to stay close to him throughout the battle to avoid being stunned and launched. If you’re more than 5m away, he will use an unblockable AoE ice rain to cc you, gapclose to you and try to launch you.
Rotation
Right Punch Combo -> Ground Ripple -> Repeat
Ground Ripple - Windstorm Airborne Combo (AoE, Unblockable)

Bomani will cast Ground Ripple as a red aoe around him. If you are hit by it, you will be stunned and he will knock you into the air, followed by Windstorm which deals very heavy damage.
Phase Mechanics
At the specified HP thresholds, Bomani will warp to the center and prepare a powerful strike. You must CC him out of this; he only has one bar, so any CC will do. CC him as soon as the bars open; do not wait for the animation. If you see him perform an animation, you were too slow.

If you do not, he will first use Chi Burst, healing himself for 10% of his max HP, then Lightning Fist (gapclose stun) and perform Frost Storm (extremely damaging melee combo), but with added pulling and stunning effects. If you fail to CC, do not tab the Lightning Fist; save it for the Frost Storm.Alternatively, just iframe the attacks.
Boss 2: Fishi - Naksun 2.0
HP: 5,850,000
Enrage: 4 Minutes
Phases: 80%, 60%, and 40%
Remember Naksun? Well, here’s a copy of him who goes by “Fishi”. His rotation is similar, but slightly different and occurs at different percentages.
Attack Patterns:
100-80%
Punch -> Dash through -> Leg Sweep -> repeat
80-60%
Fire Breath -> Counter -> Fire Breath -> Repeat
Phase Mechanics:
60-40%
Double punch (knocks back) -> Double Punch -> 4x Kick (aerials on last hit, leads to aerial combo)
40-0%
Punch -> Dash Through -> Leg Sweep -> Slide Through -> Counter
80%
Fishi will drink Soju, similarly to Naksun. CC this, or else he will gain an attack and defense buff. He’ll then perform the four-cups ranged attack, regardless of your range at the time. He then switches to his drunken rotation.
60%
Fishi will try to drink more alcohol; cc him out of it to prevent another buff. Regardless of your success, he’ll switch to a new rotation of drunken martial arts that hits harder and inflicts knockback on any successful hits.
40%
Fishi will become sober and jump to the middle of the map, and perform the pull-push ice vortex from the near-end of the Naksun fight. A large amount of red aoes will appear, indicating where giant icicles will fall. After these hit the ground, they then explode into a damaging frost coating on the ground that will inflict freeze. The coating lasts for 10 sec.

After 10 sec, a new set of icicles will fall. This repeats until the end of the fight. Unlike Naksun, though, these aoes are deterministic and will just respawn on top of where they last were.
Boss 3: Returned Slashimi
HP: 14,100,00
Enrage: 5 Minutes, 20 Seconds
Phases: 80%, 40%
He’s the most mechanically challenging of all five bosses. All of his attacks inflict Knockback.
Rotation:
Stab -> Double Slash -> Cone Slash (knocks back far if hit) -> Stab -> Lightning -> Repeat
Notable Attacks
Minion Charge (Unblockable)

At the start of the fight, and at the end of each phase, Slashimi will summon two minions, both of whom are untargetable and invincible. These minions spawn at approximately 3 o’clock and 9 o’clock, and cause a knockback AoE when they spawn. They then pick a completely random direction and charge to the wall in that direction, then despawn. They’ll launch you if you’re hit.
Water Wall (Unblockable)

This is more a mechanic than a direct attack. After the adds despawn, walls of water will appear from either 12 or 6 o’clock and move slowly towards the opposite side of the map. They are unblockable and have a singular gap through which you can pass safely. You can either move through this gap, or iframe through the walls. If they hit you, they will inflict high damage and knock you back.
Lightning Storm (CC Cancel, AoE, Unblockable)

Occasionally, Slashimi will charge up an unblockable circular AoE which emits a wave of lightning with several follow-up lightning strikes, which will stun you if it connects. CC him out of the charging animation to cancel it. This deals very high damage if not cced.
Phase Mechanics
Slashimi will jump into the air and equip a suit of armor, gaining massive damage resistance. Four harpoons will spawn around the area when he does.

He will then charge repeatedly toward the player, inflicting knockup on contact. Unlike previous encounters, this is now unblockable; the harpoons are required to deal with this.
Whenever he hits the wall, he will create two ground waves of water that will move across the map. They’re straight lines, and must be jumped over. If they touch you, you’ll take damage and gain a “Cold” debuff, which will inflict DoT on you. This debuff stacks.

The harpoon guns have four usage options. LMB to Fire, 1 to Wind, 2 to Unwind, and 3 to Hook. To deal with the armor, you must first fire the harpoon into Slashimi. After doing so, Wind it. This will allow you to start using Unwind. Every time you Unwind, you inflict a Biting debuff on Slashimi. When Biting reaches 6 stacks, Slashimi will become exhausted and temporarily immobilized. At this point, use Hook to rip his armor off, destroying your Harpoon in the process.

Finally, run over to the armor you just ripped off, pick it up, and use LMB with it to block. You must then block his charge attack with his armor to stun him out of it, dealing significant damage and ending the phase.

He will conclude the phase by launching a series of four water bullets that deal high damage and knockback. Iframe, block, or sheathe.
Boss 4: Juna
HP: 6,650,000
Enrage: 3 Minutes
Phases: 75%, 50%, 25%
The battle-scarred second-in-command of the Admiral’s fleet, Juna, does not have a fixed rotation. Most of her blockable attacks have a significant windup and will not be covered.
Notable Attacks
Stun Grenade (AoE, Unblockable)
Juna will quickly center a red AoE on you and toss an exploding grenade. This is fast enough that walking out of it is not an option, so you should SS, dash away, or iframe it.
Crescent Kick - Shoot ‘Em Up

Juna will crouch down, preparing to quickly take off. She will then gapclose rapidly to you and perform a linear aoe backflip kick.. If this hits you, it will launch you. She’ll then fill you with bullets while you’re in midair. Block, iframe, or simply strafe out of range.
Shark Cross (Unblockable)

Juna will spin her guns in a circle as a + shaped AoE spreads out from her. She’ll then perform a short hop and stomp the ground, releasing a shark in each direction.
Phase Mechanics
For each phase, Juna will jump to the center of the map, and launch eight flares. These flares have a countdown number indicating when they will land, and explode as soon as they hit the ground after 5 seconds, blinding you if you’re looking at them.
If you are blinded by the flares, all your commands will be disabled, Juna will warp behind you, taunt you, and then instantly kill you execution-style.
If you have the option, you can Phantom Grip/Grab her and move her away from the center, into a corner of the arena, so that your back is turned to the flares. The timing for the grip is after she fires into the air. Even though her CC bars are blocked, she can be grabbed.

If you do not have that option or choose to ignore it, you must distance yourself from the flares and have your back to them as well, as their explosion radius is incredibly large. A third option is to gapclose to the center, and fight her there while rotating around her to keep your back to the blinding flares. This maximizes your damage output, but is riskier.
She will then proceed to shoot a long, linear, blockable shot, then pull out 3 poison grenades in a row and throw them. Each grenade is unblockable and causes a stacking poison debuff if it hits. This poison cannot be purged by abilities that cure status effects.

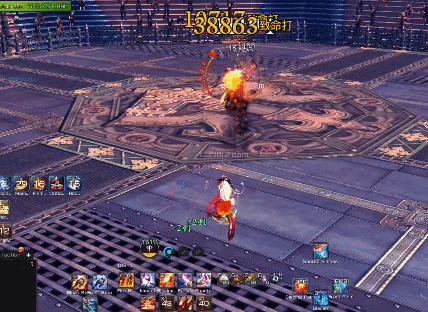
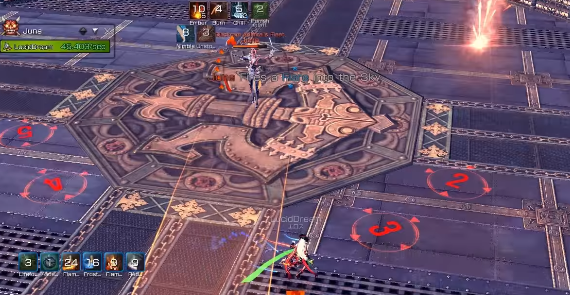
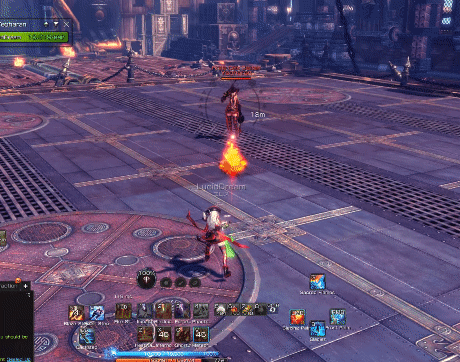
Final Boss: Yeoharan
HP: 12,200,000
Enrage: 7 Minutes
Phases: 75%, 25%
Poharan’s big sis and Captain of the Pirate Cats.
Rotation:
Yeo does not have a fixed rotation. She has quite a lot of attacks, and picks from her selection at semi-random; some attacks are more likely than others.
Attack List
Blast Grenade (Unblockable, AoE)
Yeo will center a large aoe on your position. If this hits you, it inflicts Knockdown. Expansion is fairly rapid, so it would be best to ss/dash/iframe.
Bullet Storm(Circular AoE, blockable, slight knockback. Dodge or block.)

Simple attack; can either ignore or block.
Bullet Rain(Conal AoE, blockable)

Simple attack; dodge behind her.
Deploy Turret (Unblockable, room-wide AoE)

Yeo will toss out three turrets, one at a time. Their landing zone is indicated by a red aoe, but the aoe does no damage.. Approximately one second after each turret hits the ground, it will send out a room-wide unblockable shockwave. Jump over the shockwave; good timing for this is just as the red AoE from the turret landing fades away.
Flame Wall Mine (Unblockable, repeated AoE)

Yeo likes to use this by dashing behind you immediately after deploying her third turret and dumping it at close range. It’s a wide, expanding AoE; iframe it.
Hauling Anchor (Unblockable, Persistent)

Yeo will jump very far away from you, wind up, and throw a gigantic anchor at you. It is unblockable and inflicts Knockback if it connects. The anchor will bounce off any walls it hits and continue to spin around the field for a long time, but gets smaller over time.
Anklebiter (Blockable, Conal AoE)

Yeo quickly dashes behind the player, winds up and releases a huge frontal swipe. Can be blocked, but will knock you down if it hits you. Very large range for a simple swipe.
Cross Snipe (Unblockable, Linear AoEs)

Yeo quickly dashes behind the player, then takes aim with a thin, extremely long linear series of shots on both sides of her, then rotates and performs it 2-3 more times in succession.
Mechanic Phases
During her phases, Yeo will jump out of the battlefield and prepare to snipe you. She will summon three cats; Grapes (the Warrior), Strawberry (the Healer), and Watermelon (the Tank). Grapes aggressively attacks, dealing high damage and inflicting ccs. Watermelon attacks less frequently, but has a lot of HP and tends to go into a crouched stance to reduce damage taken. Strawberry doesn’t attack but simply heals the other two cats. Take Grapes out first, then Strawberry, then Watermelon. You can also CC Watermelon out of the crouched stance, unlike when fighting real Summoners.
Yeoharan will repeatedly snipe you, then attempt to drop rocket nukes on you during this phase. A large AoE will appear on you, and a second, larger ring will appear outside this AoE, and slowly close in on it.

Once the two rings overlap, the AoE will lock in place and a rocket will descend on the area. Quickly dash/ss/iframe to avoid the incoming explosion.

Kill the three cats as quickly as you can to end the phase. Both phases are the same.
Fair credit attribution: This is an expanded, written version of the video guide made by LucidDream, aka Licod Games.
I’ve extracted highlights from the video, but also added additional information, clarifying notes, and attack descriptions for notable attacks.
Litewarior gave the rotations for the first three bosses.
Original video can be found at the following link:
Disclaimer: Since I’m basing this on JP HP values, the actual values may be different in NA. The names are also taken from JP, and may be incorrect. I will update the names later once everything is out. -Dreamslayer
Outlaw Island
Outlaw Island is a solo dungeon consisting of five consecutive boss fights. The fights vary greatly in mechanical difficulty, but are all easily possible with around 700 AP.
Boss 1: Awakened Bomani
HP: 3,470,000
Enrage: 3 Minutes
Phases: 70% and 40%
Bomani is an Ice-type Soul Fighter who specializes in long range combat. You will need to stay close to him throughout the battle to avoid being stunned and launched. If you’re more than 5m away, he will use an unblockable AoE ice rain to cc you, gapclose to you and try to launch you.
Rotation
Right Punch Combo -> Ground Ripple -> Repeat
Ground Ripple - Windstorm Airborne Combo (AoE, Unblockable)
Bomani will cast Ground Ripple as a red aoe around him. If you are hit by it, you will be stunned and he will knock you into the air, followed by Windstorm which deals very heavy damage.
Phase Mechanics
At the specified HP thresholds, Bomani will warp to the center and prepare a powerful strike. You must CC him out of this; he only has one bar, so any CC will do. CC him as soon as the bars open; do not wait for the animation. If you see him perform an animation, you were too slow.
If you do not, he will first use Chi Burst, healing himself for 10% of his max HP, then Lightning Fist (gapclose stun) and perform Frost Storm (extremely damaging melee combo), but with added pulling and stunning effects. If you fail to CC, do not tab the Lightning Fist; save it for the Frost Storm.Alternatively, just iframe the attacks.
Boss 2: Fishi - Naksun 2.0
HP: 5,850,000
Enrage: 4 Minutes
Phases: 80%, 60%, and 40%
Remember Naksun? Well, here’s a copy of him who goes by “Fishi”. His rotation is similar, but slightly different and occurs at different percentages.
Attack Patterns:
100-80%
Punch -> Dash through -> Leg Sweep -> repeat
80-60%
Fire Breath -> Counter -> Fire Breath -> Repeat
Phase Mechanics:
60-40%
Double punch (knocks back) -> Double Punch -> 4x Kick (aerials on last hit, leads to aerial combo)
40-0%
Punch -> Dash Through -> Leg Sweep -> Slide Through -> Counter
80%
Fishi will drink Soju, similarly to Naksun. CC this, or else he will gain an attack and defense buff. He’ll then perform the four-cups ranged attack, regardless of your range at the time. He then switches to his drunken rotation.
60%
Fishi will try to drink more alcohol; cc him out of it to prevent another buff. Regardless of your success, he’ll switch to a new rotation of drunken martial arts that hits harder and inflicts knockback on any successful hits.
40%
Fishi will become sober and jump to the middle of the map, and perform the pull-push ice vortex from the near-end of the Naksun fight. A large amount of red aoes will appear, indicating where giant icicles will fall. After these hit the ground, they then explode into a damaging frost coating on the ground that will inflict freeze. The coating lasts for 10 sec.
After 10 sec, a new set of icicles will fall. This repeats until the end of the fight. Unlike Naksun, though, these aoes are deterministic and will just respawn on top of where they last were.
Boss 3: Returned Slashimi
HP: 14,100,00
Enrage: 5 Minutes, 20 Seconds
Phases: 80%, 40%
He’s the most mechanically challenging of all five bosses. All of his attacks inflict Knockback.
Rotation:
Stab -> Double Slash -> Cone Slash (knocks back far if hit) -> Stab -> Lightning -> Repeat
Notable Attacks
Minion Charge (Unblockable)
At the start of the fight, and at the end of each phase, Slashimi will summon two minions, both of whom are untargetable and invincible. These minions spawn at approximately 3 o’clock and 9 o’clock, and cause a knockback AoE when they spawn. They then pick a completely random direction and charge to the wall in that direction, then despawn. They’ll launch you if you’re hit.
Water Wall (Unblockable)
This is more a mechanic than a direct attack. After the adds despawn, walls of water will appear from either 12 or 6 o’clock and move slowly towards the opposite side of the map. They are unblockable and have a singular gap through which you can pass safely. You can either move through this gap, or iframe through the walls. If they hit you, they will inflict high damage and knock you back.
Lightning Storm (CC Cancel, AoE, Unblockable)
Occasionally, Slashimi will charge up an unblockable circular AoE which emits a wave of lightning with several follow-up lightning strikes, which will stun you if it connects. CC him out of the charging animation to cancel it. This deals very high damage if not cced.
Phase Mechanics
Slashimi will jump into the air and equip a suit of armor, gaining massive damage resistance. Four harpoons will spawn around the area when he does.
He will then charge repeatedly toward the player, inflicting knockup on contact. Unlike previous encounters, this is now unblockable; the harpoons are required to deal with this.
Whenever he hits the wall, he will create two ground waves of water that will move across the map. They’re straight lines, and must be jumped over. If they touch you, you’ll take damage and gain a “Cold” debuff, which will inflict DoT on you. This debuff stacks.
The harpoon guns have four usage options. LMB to Fire, 1 to Wind, 2 to Unwind, and 3 to Hook. To deal with the armor, you must first fire the harpoon into Slashimi. After doing so, Wind it. This will allow you to start using Unwind. Every time you Unwind, you inflict a Biting debuff on Slashimi. When Biting reaches 6 stacks, Slashimi will become exhausted and temporarily immobilized. At this point, use Hook to rip his armor off, destroying your Harpoon in the process.
Finally, run over to the armor you just ripped off, pick it up, and use LMB with it to block. You must then block his charge attack with his armor to stun him out of it, dealing significant damage and ending the phase.
He will conclude the phase by launching a series of four water bullets that deal high damage and knockback. Iframe, block, or sheathe.
Boss 4: Juna
HP: 6,650,000
Enrage: 3 Minutes
Phases: 75%, 50%, 25%
The battle-scarred second-in-command of the Admiral’s fleet, Juna, does not have a fixed rotation. Most of her blockable attacks have a significant windup and will not be covered.
Notable Attacks
Stun Grenade (AoE, Unblockable)
Juna will quickly center a red AoE on you and toss an exploding grenade. This is fast enough that walking out of it is not an option, so you should SS, dash away, or iframe it.
Crescent Kick - Shoot ‘Em Up
Juna will crouch down, preparing to quickly take off. She will then gapclose rapidly to you and perform a linear aoe backflip kick.. If this hits you, it will launch you. She’ll then fill you with bullets while you’re in midair. Block, iframe, or simply strafe out of range.
Shark Cross (Unblockable)
Juna will spin her guns in a circle as a + shaped AoE spreads out from her. She’ll then perform a short hop and stomp the ground, releasing a shark in each direction.
Phase Mechanics
For each phase, Juna will jump to the center of the map, and launch eight flares. These flares have a countdown number indicating when they will land, and explode as soon as they hit the ground after 5 seconds, blinding you if you’re looking at them.
If you are blinded by the flares, all your commands will be disabled, Juna will warp behind you, taunt you, and then instantly kill you execution-style.
If you have the option, you can Phantom Grip/Grab her and move her away from the center, into a corner of the arena, so that your back is turned to the flares. The timing for the grip is after she fires into the air. Even though her CC bars are blocked, she can be grabbed.
If you do not have that option or choose to ignore it, you must distance yourself from the flares and have your back to them as well, as their explosion radius is incredibly large. A third option is to gapclose to the center, and fight her there while rotating around her to keep your back to the blinding flares. This maximizes your damage output, but is riskier.
She will then proceed to shoot a long, linear, blockable shot, then pull out 3 poison grenades in a row and throw them. Each grenade is unblockable and causes a stacking poison debuff if it hits. This poison cannot be purged by abilities that cure status effects.
Final Boss: Yeoharan
HP: 12,200,000
Enrage: 7 Minutes
Phases: 75%, 25%
Poharan’s big sis and Captain of the Pirate Cats.
Rotation:
Yeo does not have a fixed rotation. She has quite a lot of attacks, and picks from her selection at semi-random; some attacks are more likely than others.
Attack List
Blast Grenade (Unblockable, AoE)
Yeo will center a large aoe on your position. If this hits you, it inflicts Knockdown. Expansion is fairly rapid, so it would be best to ss/dash/iframe.
Bullet Storm(Circular AoE, blockable, slight knockback. Dodge or block.)
Simple attack; can either ignore or block.
Bullet Rain(Conal AoE, blockable)
Simple attack; dodge behind her.
Deploy Turret (Unblockable, room-wide AoE)
Yeo will toss out three turrets, one at a time. Their landing zone is indicated by a red aoe, but the aoe does no damage.. Approximately one second after each turret hits the ground, it will send out a room-wide unblockable shockwave. Jump over the shockwave; good timing for this is just as the red AoE from the turret landing fades away.
Flame Wall Mine (Unblockable, repeated AoE)
Yeo likes to use this by dashing behind you immediately after deploying her third turret and dumping it at close range. It’s a wide, expanding AoE; iframe it.
Hauling Anchor (Unblockable, Persistent)
Yeo will jump very far away from you, wind up, and throw a gigantic anchor at you. It is unblockable and inflicts Knockback if it connects. The anchor will bounce off any walls it hits and continue to spin around the field for a long time, but gets smaller over time.
Anklebiter (Blockable, Conal AoE)
Yeo quickly dashes behind the player, winds up and releases a huge frontal swipe. Can be blocked, but will knock you down if it hits you. Very large range for a simple swipe.
Cross Snipe (Unblockable, Linear AoEs)
Yeo quickly dashes behind the player, then takes aim with a thin, extremely long linear series of shots on both sides of her, then rotates and performs it 2-3 more times in succession.
Mechanic Phases
During her phases, Yeo will jump out of the battlefield and prepare to snipe you. She will summon three cats; Grapes (the Warrior), Strawberry (the Healer), and Watermelon (the Tank). Grapes aggressively attacks, dealing high damage and inflicting ccs. Watermelon attacks less frequently, but has a lot of HP and tends to go into a crouched stance to reduce damage taken. Strawberry doesn’t attack but simply heals the other two cats. Take Grapes out first, then Strawberry, then Watermelon. You can also CC Watermelon out of the crouched stance, unlike when fighting real Summoners.
Yeoharan will repeatedly snipe you, then attempt to drop rocket nukes on you during this phase. A large AoE will appear on you, and a second, larger ring will appear outside this AoE, and slowly close in on it.
Once the two rings overlap, the AoE will lock in place and a rocket will descend on the area. Quickly dash/ss/iframe to avoid the incoming explosion.
Kill the three cats as quickly as you can to end the phase. Both phases are the same.